Introduction
Every course in LearnFlex can have one or more instances. Each instance or occurrence of a course is called a course session (or sometimes just called session). You can create different sessions to account for various classes over a period of time, or when each session of a course is held at a different location.
Sessions inherit catalogue settings. Changing a session date has the potential to remove (overwrite) a conflicting course.
Like the course itself, once you have completed setting up your session, you need to publish it so that users can find it during searches. Unpublishing a session only affects that particular session; users can see other published session of that course. However, if the course itself is unpublished, then all sessions, regardless of status, cannot be seen by users.
Procedure
1. From the Courses menu, click Add New Course.
The Course Basics screen is displayed.
2. Click Session Basics.
Note: This left-hand side menu is available when security setting 49: Course Sessions is enabled.
The following screen is displayed:
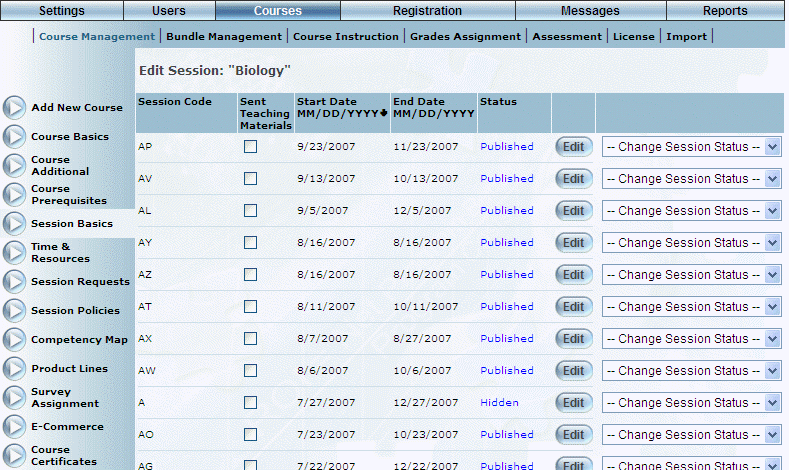
Editing a Session
This screen displays all sessions that have been created for the selected course. The following columns of information are displayed:
· Session Code (link): Displays the code assigned to the session of the course.
· Sent Teaching Materials: Indicates if teaching materials have been sent to the instructor of an instructor-led course. Checking this box enables the Materials Received box on the Course Instruction screen.
· Start Date: Displays the day, month, and year when the session has started or will start.
· End Date: Displays the day, month, and year when the session ended or will end.
· Status: Displays the status of the course. Possible statuses include: Published (available to learners for registering), Hidden (not displayed in searches or available for registering), and Display Only (available in course search results in User mode but not available for registering).
3. You can perform the following operations from this screen:
· Click Add New Session to create a new session for the course.
· Click either the Session Code link or Edit to edit details of an existing session.
· Check the Sent Teaching Materials box for those sessions that have sent out teaching materials.
· Select Display Only from the Change Session Status drop-down list if you want to display but not allow users to enroll in the session while searching for learning activities.
· Select Hidden from the Change Session Status drop-down list if you want to hide the session from users, but make it available to administrators for editing and enrollments.
· Select Unpublish from the Change Session Status drop-down list if you want to unpublish the session and unenroll all students currently enrolled in it.
· Select Publish from the Change Session Status drop-down list if you want to publish the session.
Note: This option is available only when the session is not published.