Introduction
Use this section to enroll an entire group into a course or LearnTrack. The process has additional steps when registering a group in an E-Commerce course.
Note: Security setting 774: Course Registration - Show Menu Item displays the Course Registration sub-menu within the Registration module. By default, this security setting is enabled (standard functioning). If this box is unchecked, then this menu is no longer displayed. However, you can still access the functionality to register a group from the Course Instruction screen when security setting 768: Register More Users is enabled.
Procedure
1. From the Registration menu, select Course Registration.
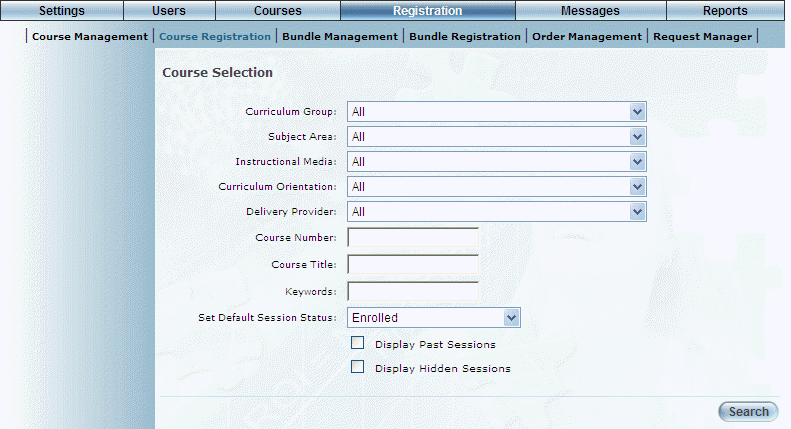
The Course Selection screen is displayed:
Course Registration
2. Use the fields and drop-down lists to search for the course into which you want your group enrolled.
Note: Security setting 136: Course Registration – Display Curriculum Groups must be enabled to display the Curriculum Group drop-down list.
Note: Security settings 137: Course Registration – Display Past Sessions and 138: Course Registration – Display Hidden Sessions must be enabled to display the Display Past Sessions and Display Hidden Sessions check boxes respectively.
Note: The Set Default Session Status drop-down list is displayed when security setting 528: Course Registration – Set Default Session Status is enabled.
3. Click Search or press Enter on your keyboard to launch the search.
The results of your search are displayed:
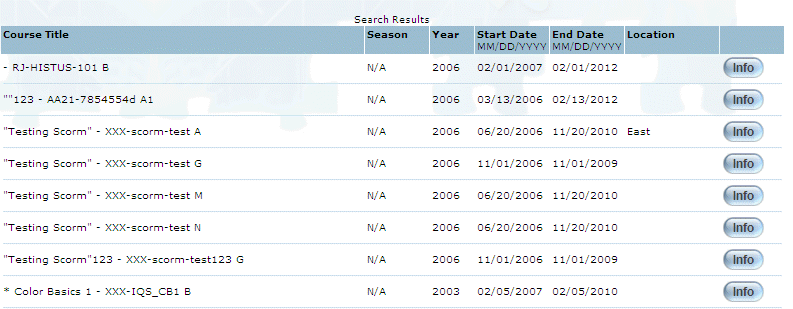
Course Registration Search Results
This screen displays all courses that match your search criteria.
Note: You can change the format of the start and end dates through a global setting. Contact your LearnFlex representative for details.
4. Click the Course Title link of the course in which you want to register users.
The Group Selection screen is displayed:
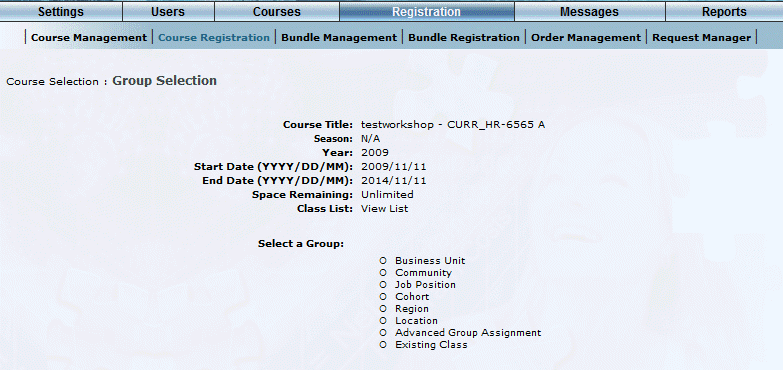
Group Selection
5. In the Select a Group section, click the link of the type of group you want to enroll in the course or LearnTrack.
Note: The following security settings are required to display each of the option buttons:
120: Course Registration – Business Unit: Displays the Business Unit option button.
121: Course Registration – Community: Displays the Community option button.
122: Course Registration – Job Position: Displays the Job Position option button.
123: Course Registration – Cohort: Displays the Cohort option button.
124: Course Registration – Region: Displays the Region option button.
125: Course Registration – Location: Displays the Location option button.
126: Course Registration – Advanced: Displays the Advanced Group Assignment option button.
166: Course Registration – Existing Class: Displays the Existing Class option button.
Note: One of the security settings listed above must be enabled to continue registering a group into a course.
Note: Click the Return to Course Instruction button if you do not want to continue with the course registration. This button is displayed only when security setting 768: Register More Users is enabled and the Register More Users button has been clicked from the Learner Detail report (from the Course Instruction module).
The following screen is displayed:
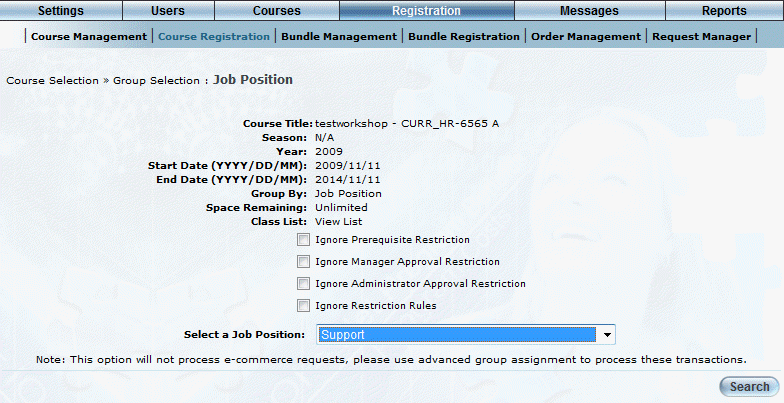
Enrolling a Group in a Course
Use this screen to determine the list of students who are eligible to be registered in this LearnTrack.
Note: The information (Title, and so on) at the top was displayed on the previous screen.
Hint: You can click the Title link to view details of the LearnTrack in a pop-up window.
Hint: Click the View List link to view the Course Student List screen for the selected course.
6. Check the boxes in the Ignore section to override those students who normally would not be allowed to be registered in the LearnTrack due to insufficient permissions.
However, checking the appropriate boxes means that the restrictions (identified by a Conflict status in the search results) will be ignored in this search instance, giving you will have the ability to register those students.
Note: When available, you can also check the Show Reenrollments box to view those students who are eligible to be re-enrolled in a course. Their status will be shown as Complete/Reenroll. If this box is not available or not checked, the students’ status will be shown instead as Completed (and they cannot be re-enrolled in a course).
Note: The following security settings must be enabled to see each of the check boxes:
293 - Course Registration – Ignore Prerequisite: Displays the Ignore Prerequisite Restriction check box.
564: Course Registration – Ignore Administrator Approval: Displays the Ignore Administrator Approval Restriction check box.
565: Course Registration – Ignore Manager Approval: Displays the Ignore Manager Approval Restriction check box.
713: Course Registration – Ignore Restriction Rules: Displays the Ignore Restriction Rules check box.
736: Course Registration – Ignore Job Position Conflict: Displays the Ignore Job Position Conflicts check box.
7. Continue filtering your list.
8. Once you have finished filtering your list, click Search.
The screen is re-displayed with the search results in the bottom section. An example is shown below:
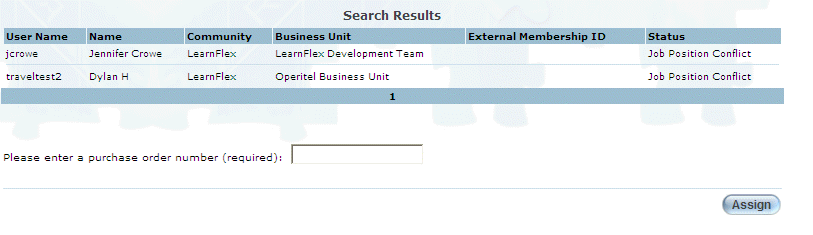
Assigning a Course to a Group
This screen displays information about each of the users in the group.
9. You can perform the following operations from this screen:
· Assuming that there are users that can be registered in this course (those with a status of Completed/Reenroll, or without a status), check the boxes of the users that you want to register. (Available only for the Advanced Group Registration option).
· Click Select All (not shown) to check the boxes of all available users in one operation. Note that this option is available only for the Advanced Group Registration option. For all other types, all users in the search results will be automatically registered when you click Assign.
· Click Clear All (not shown) to remove all check boxes in one operation. Note that this option is available only for the Advanced Group Registration option.
· When displayed, check the Don’t send notifications box if you do not want to inform users that their status in the course has changed. By default, this box is not checked.
· After checking at least one box (available only for the Advanced Group Registration option) or after displaying the group you want to register (for all options other than Advanced Group Registration), click Assign to register the users in the course. The screen will be re-displayed. The Status column for the selected users will change to Enrolled.
10. To modify the enrollment for a course, choose a curriculum group from the Select Curriculum Group drop-down, optionally choose a year and season from the Year and Season drop-downs, and finally, choose the course from the Choose Course drop-down.
You also have the option to hide empty and hidden sessions by checking the Hide Empty Sessions and/or Hide Finished Session check boxes. Once you have chosen your search criteria, click the Submit button to arrive at a list of sessions for the chosen course.
11. To look at more information about a course, click the Course Code of the course in the session’s list.
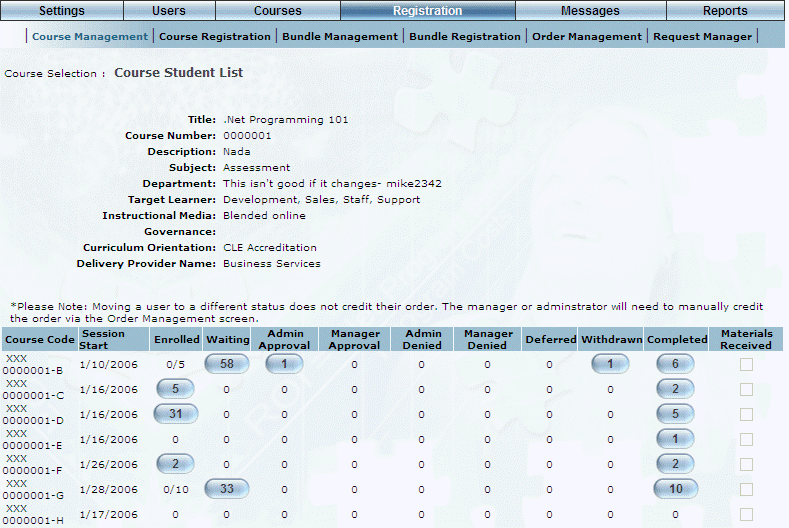
Course Lists
On the list of sessions you will see how many students are enrolled in the session and what their enrollment status is. A learner may be on any of the following lists:
· Enrolled: Enrolled in the course.
· Waiting: On the waiting list for the course.
· Admin Approval: Requires administrator approval for this course.
· Manager Approval: Requires manager approval for this course.
· Admin Denied: Indicates that an administrator has denied enrollment in this course to the user.
· Manager Denied: A manager has denied enrollment in this course to the user.
· Deferred: The learner has been granted the right to take the course in the future, but is not currently enrolled.
· Withdrawn: The user has withdrawn from this course.
· Completed: The user has completed this course.