Introduction
Use this section to change a user’s status in regards to a specific course or bundle. For example, someone currently on a waiting list may be placed in a course. Someone awaiting manager approval may be granted permission to take a course. The status on a user’s course will change according to the modifications made here. For example, a Pending status may change to Registered and a Launch button may appear (online course).
Note: To be able to change a user's registration status and send notifications to them about the change, you need to make sure that security setting 199: Status Change is enabled. This displays the check boxes on the User Listing pop-up window and the message text box. If not enabled, you will only be able to view those students based on status.
Note: Changing a user’s status will not credit their order. The manager or administrator will need to credit the order manually through the Order Management screen.
Procedure
1. From the Registration menu, select Course Management.
The following screen is displayed:
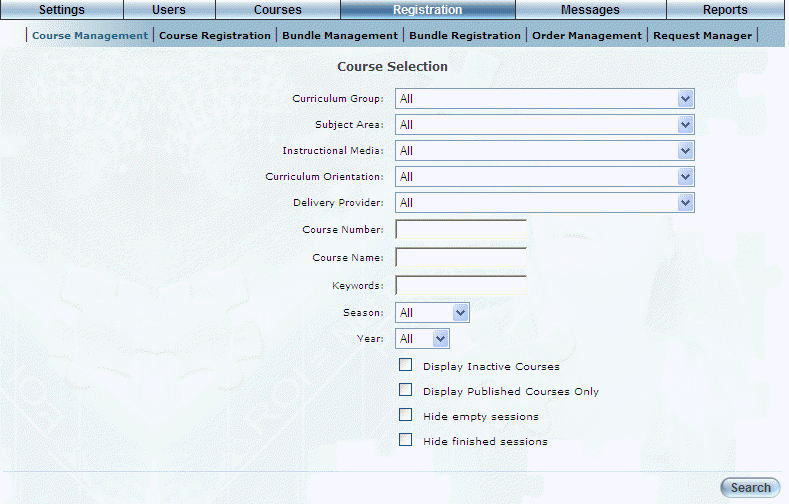
Registration – Course Management – Search
2. Use the drop-down lists and fields to filter the courses returned in your results.
Note: The Curriculum Group drop-down list is displayed when security setting 572: Registration - Course Management-Display Curriculum Group is enabled.
Note: The Display Inactive Courses check box is displayed when security setting 573: Registration - Course Management - Display Inactive Courses is enabled.
3. Click Search.
Your search results are displayed at the bottom of the screen:
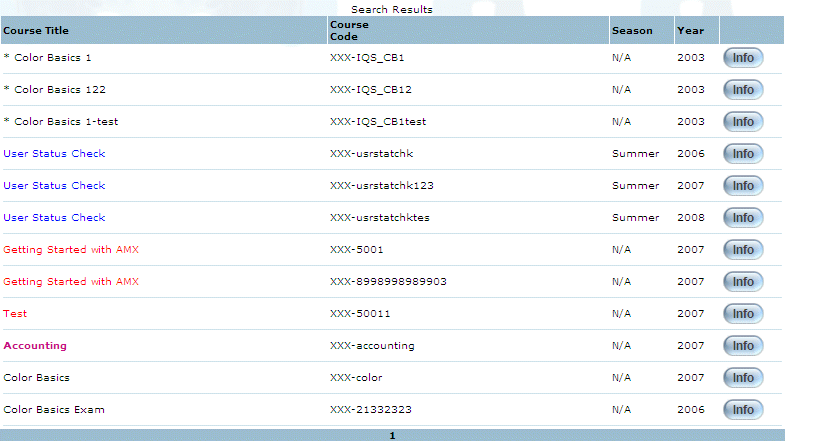
Registration - Course Management - Search Results
4. Click the Course Title link of the course and session that you want to view and modify.
The following screen is displayed:
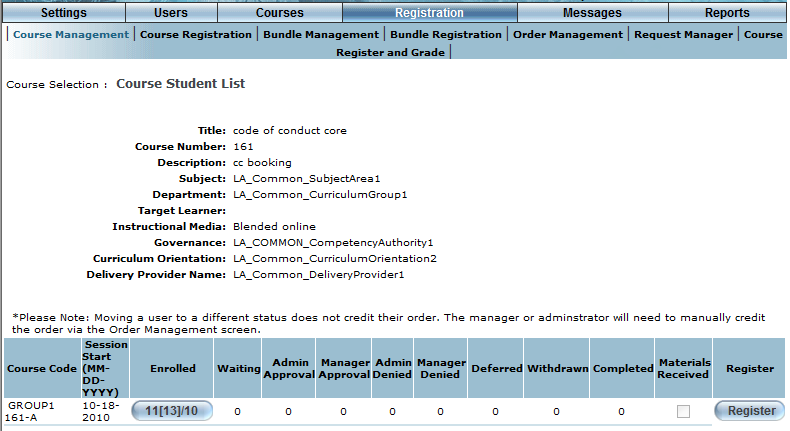
Course Student List
The first section displays information about the selected session.
The second section (the table) indicates the number of people within each course status.
The Enrolled button on the Course Student List shows you information based on three separate criteria:
· Class size limit (first number on the left)
· Total number of enrolled users (inside square brackets)
· Number of users who are of equal level in business unit hierarchy to you (after the slash)
Note: When Unrestricted Business Units is disabled on the Client Setup screen, only users in a business unit subordinate to yours will be displayed in the Enrolled section (so the first number will not be displayed). When Unrestricted Business Units is enabled you will be able to see users in your business unit level and all those subordinate to you.
5. You can perform the following operations from this screen:
· When enabled, check the Materials Received box to indicate that you (the instructor) have received the teaching materials for the selected session. This check box is also displayed when viewing your course instruction list.
· Click the Register button for any session to navigate directly to the Group Selection screen and register users into the selected session.
· Click a Course Code link to view the Course Properties report. An example is shown below:
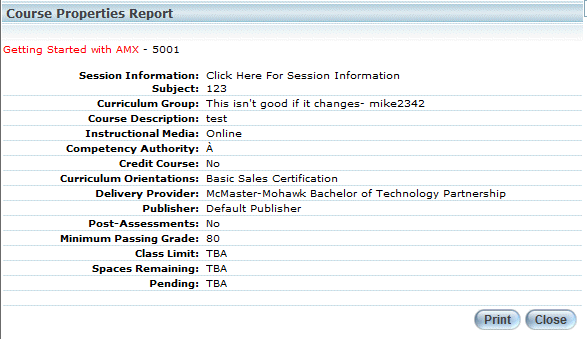
The Pending field displays the number of people who have attempted to enroll after the class limit has been reached and have been put on a waiting list.
· For any session status that has a button (indicates that there are users with that status), click that button to modify the registration status of one or more users. An example of the screen is shown below:
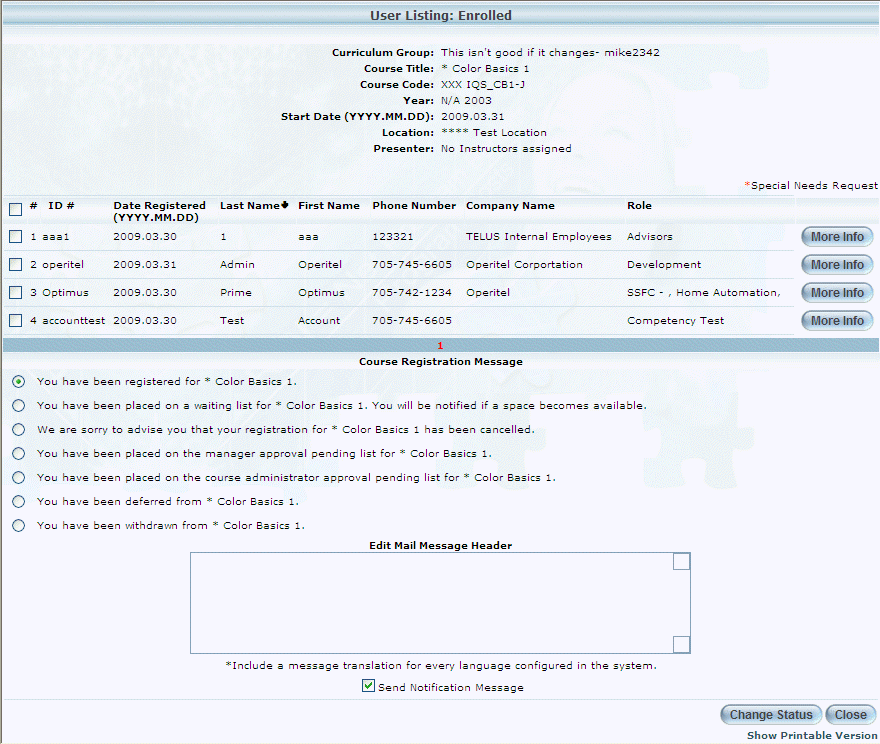
Registration - Course Management - Change Student Status
The first section of the screen displays information about the selected session. The following columns of information are displayed:
· ID #: Displays the ID of the user registered in the learning activity.
· Date Registered: Displays the year, month, and day when the user registered for the learning activity. You can change the display of this date through a global setting. Contact your LearnFlex representative for details.
· Last Name: Displays the last name of the user who is registered in the learning activity.
· First Name: Displays the first name of the user who is registered in the learning activity.
· Phone Number: Displays the user's work telephone number.
· Company Name: Displays the name of the company where the user works.
· Role: Displays the user's job position.
Hint: You can change the way the columns are sorted by clicking on any of the Date Registered, Last Name, or First Name column headers.
6. Click a user ID link to display a pop-up window where you can view and print information about both the student and the course.
7. You can perform the following operations from this screen:
· Check the boxes of those users whose status you want to change.
Hint: Checking the ID box will select all users on the page in one step.
· In the Course Registration Message section, select the option button of the status you want to give to the selected users. Changing the user here actually changes the list the user will be on. For example, a user on a wait list can be moved into a course. The text for the selected option will be placed in the next box which will be sent to the user.
· In the Edit Mail Message Header section, enter or update the text regarding the status change if needed. The message will be available in the user’s Message Centre.
· Check the Send Notification Message box if needed.
· Select Change Status when you have finished making your changes.
· Click Show Printable Version to display a pop-up window of the users who are enrolled in the course. You can print this screen to use as a class sign-in sheet.
· Click Close to exit the window. Note: Your changes will not be sent if you click Close without clicking Change Status.