Introduction
Use this section to review, then approve or deny requests for internal or external courses or sessions. Typically, this area is used when you want to approve or deny multiple course requests. Users will not be able to register for courses until manager approval has been granted.
Note: Approving users for course requests is required only for those users who have been configured for requiring manager approval. See Activating a User for details.
Hint: You can approve or deny users’ course requests on an individual level as well. See Course Administration of a User for details.
Levels of Approval
Managers can have a single or dual level process for approving learning activities. Single level approval allows one manager the ability to approve or deny a course. A dual level approach allows two managers to approve or deny a user access to a course. The first manager provides approval or denial for the requested course, which is then reviewed by a second manager who grants final approval. It is the second manager who then brings about the actual status change in User mode.
Procedure
1. From the Users menu, select Manager Approval Search.
Note: This left-hand side menu is displayed when security setting 576: Manager Approval Search is enabled.
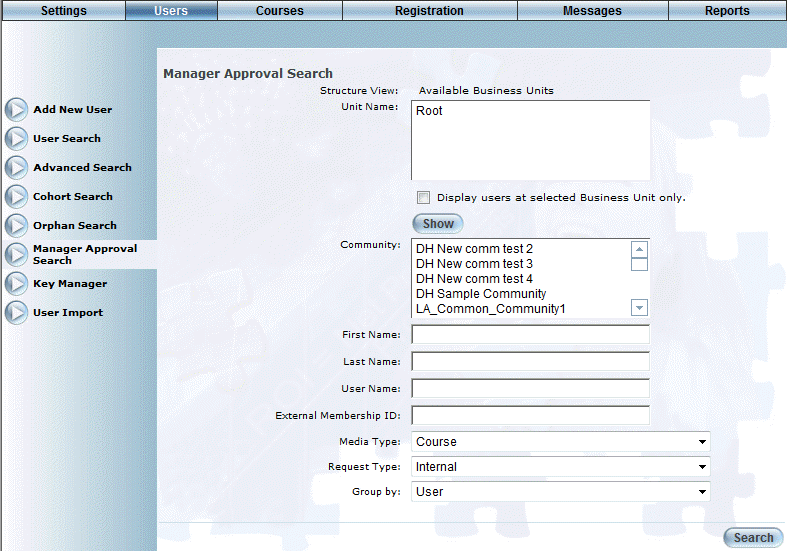
The Manager Approval Search screen is displayed:
Manager Approval Search
2. Use the Structure View and Unit Name links to select the business unit whose messages you want to search for.
You can do this in the following way:
· Use the Unit Name drop-down list to display the current business unit. To view the business units beneath it, highlight the business unit and click Show.
Hint: First check the Search selected Business Unit only box, then Show to display those business units within the selected one. Otherwise, you will see all child business units.
Note: The Display users at selected Business Unit only box is displayed when security setting 648: Display Users at Selected Business Unit Only is enabled.
· Click the Structure View link to display the business units above the selected business unit.
· Once you have located the required business unit, highlight it. You can select one or more business units as needed.
3. Use the Community list box to filter your results by one or more communities.
4. Use the First Name, Last Name, and/or User Name fields to narrow your results by the user's actual name or user name.
5. In the External Membership ID field, enter the external ID of the user for whom you are searching.
You can enter a maximum of 80 characters (alphanumeric).
6. Use the Media Type drop-down list to narrow your results by Course or LearnTrack.
7. Use the Request Type drop-down list to select the type of request that you are looking for.
You can choose:
· Internal: Displays all requests for internal courses (courses created and delivered within LearnFlex).
· External - Pending Approval: Lists those external courses that users have requested but need to be approved.
· External - Pending Scheduling: Lists those external courses that have been approved but the LMS administrator has yet to create the course.
Note: This drop-down list is displayed when security setting 739: Manager Approval External Training Requests is displayed.
8. Use the Group By drop-down list to indicate if you want your results to be grouped by user or by media type (learning activity).
9. Click Search.
The results of your search are displayed. The screen that is displayed depends on the type of request. All three are explained.
Internal Requests
The following screen is displayed:
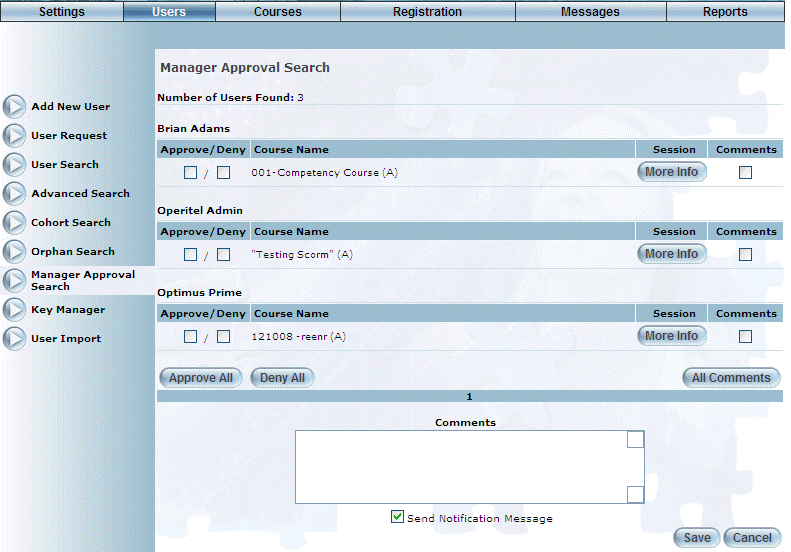
Viewing Internal Requests
10. You can perform the general operations from this screen:
· Click a user name link to view that user’s Course Administration details.
· Click a course name link to view the Course Properties report for the selected course. You can choose to print the report or simply close the pop-up window.
· Click a session’s More Info button to view a pop-up window that contains additional details about a selected session. You can choose to print this information or simply close the window.
11. To approve or deny a user’s registration in a session:
· Check the appropriate Approve or Deny box for a user’s session. Hint: Use the Approve All and Deny All buttons to apply the same status for all users in one operation.
Note: If an administrator has already given their recommendation and security setting 544: Manager Approve/Deny Checkboxes has been enabled, then a green check or a red X will be displayed indicating the approval or denial.
· To send comments to users about their registration status: 1) Check the Comments box for each user. Hint: Use the All Comments buttons to check all Comments boxes in one operation. 2) In the Comments box, enter your text. All users will be able to see this text in the appropriate message in their Message Centre. From this screen, you cannot enter specific comments for individual users.
· Check the Send Notifications box if you want users to receive an email about their change in registration status in addition to receiving a message in the Message Centre.
· Click Save to keep your changes.
Note: Enabling security setting 543: Manager Approve/Deny Buttons displays (enables) the Approve and Deny check boxes for each record in the list, the Approve All/Deny All buttons at the bottom of the screen, Notifications check box, and the Save button.
External Requests – Pending Approval
The following screen is displayed:
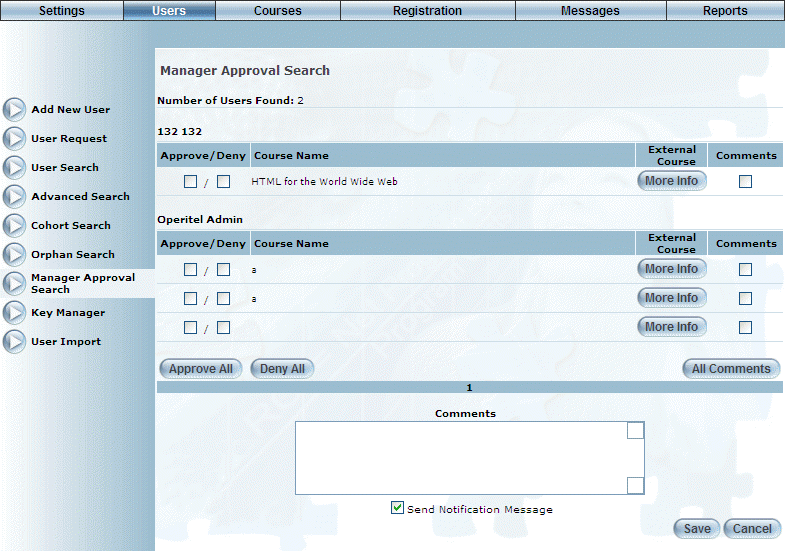
Viewing External Requests – Pending
Use this screen to approve or deny those requests for external training.
As the operations for external pending requests are the same as for internal requests, see Internal Requests (above) for details.
Note: Clicking the More Info button on this screen will display the external request form that the user completed in User mode.
External Requests – Pending Scheduling
The following screen is displayed:
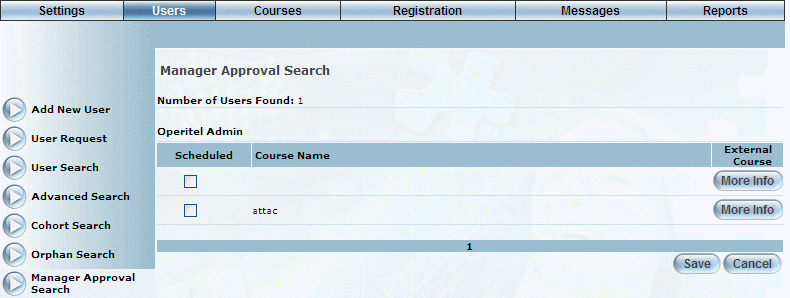
Viewing External Scheduled Requests
12. You can perform the following operations from this screen:
· Check the Scheduled box to indicate that the status of the course should change from Pending to Scheduled. The LMS administrator would change the status after they have created the course.
· Click the More Info button to display external request form the user completed in User mode.
13. Click Save to keep your changes.