Introduction
Use this section to review the information in your basic user profile as specified initially by your administrator.
Note: If the User Manager security group does not have security granted, then the Basic Information left-hand side menu for that user is displayed as read-only. No other left-hand side menus are displayed.
Procedure
1. After logging in, click the Profile menu.
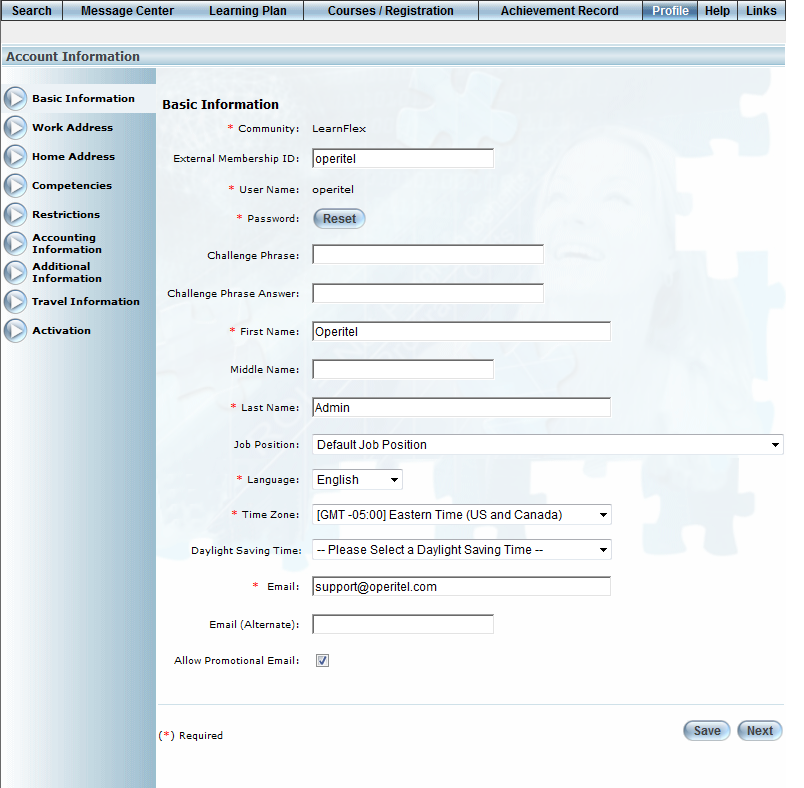
The Basic Information screen is displayed:
Profile: Basic Information
The Community value indicates the community to which you belong, and your user name indicates the name that you use to log in. You cannot change either of these values.
2. In the External Membership ID field, enter or update a unique code for this user that can be used for external reporting purposes.
You can specify a maximum of 80 characters (alphanumeric).
3. Click the Password Reset button to change your password.
Note: This button is displayed when security setting 212: Password Reset Button is enabled.
4. In the Challenge Phrase field, enter or update a phrase that will be displayed if you forget your password.
The phrase will be used when, after accessing the login screen, you click the Password Reminder link.
This field, and the next one, are displayed based on a global setting.
5. In the Challenge Phrase Answer field, enter or update the answer to the challenge phrase specified above.
Note: This value is optional. If you do not enter an answer, the user will not be required to enter an answer to the challenge phrase.
6. In the First Name field, enter or update your first name.
You must specify a minimum of one character to a maximum of maximum of 50 characters (alphanumeric).
7. In the Middle Name field, enter or update your middle name.
You can specify a maximum of 50 characters (alphanumeric).
8. In the Last Name field, enter or update your last name.
You must specify a minimum of one character to a maximum of 50 characters (alphanumeric).
9. Use the Job Position drop-down list to specify your job position.
While specifying one is not mandatory, setting a job position can automatically link users to courses, including LearnTracks.
10. Use the Language drop-down list to specify the language in which LearnFlex will be displayed for you.
This affects not only the interface, but messages too.
The languages available from this list are user-defined through a global setting. Contact your LearnFlex representative for details.
Note: The change in language display is reflected only after you log in again. To see immediate changes, you can change the language dynamically from the Language drop-down list.
11. Use the Time Zone drop-down list to specify the time zone where you reside.
The default value is defined through a global setting but can be changed here as needed. Contact your LearnFlex representative for details about the global setting.
This selection determines the values available in the next drop-down list.
12. Use the Daylight Saving Time drop-down list to associate a daylight saving time with your user profile.
The values available for the associated time zone are configured in the Daylight Saving Time module. The default daylight saving entry is marked with an asterisk (*). This is for informational purposes only.
Note: This drop-down list is displayed when security setting 783: Daylight Saving Time is enabled.
13. In the Email Address field, enter or update your primary email address.
You will receive system emails and automated messages to this address.
14. In the Email (Alternate) field, enter or update a secondary or alternate email address.
15. Check the Allow Promotional Email box to ensure that you receive automated messages flagged as promotional.
This box is checked by default.
16. Click Save to keep your changes.