Introduction
Use this section to add a daylight saving time entry to a selected time zone.
After you have created your daylight saving entries, you then can apply them to users and/or sessions.
Procedure
1. Access the main Daylight Saving Time screen.
2. Use the Time Zone drop-own list to select the time zone whose daylight saving time entries you want to manage.
3. Click Add.
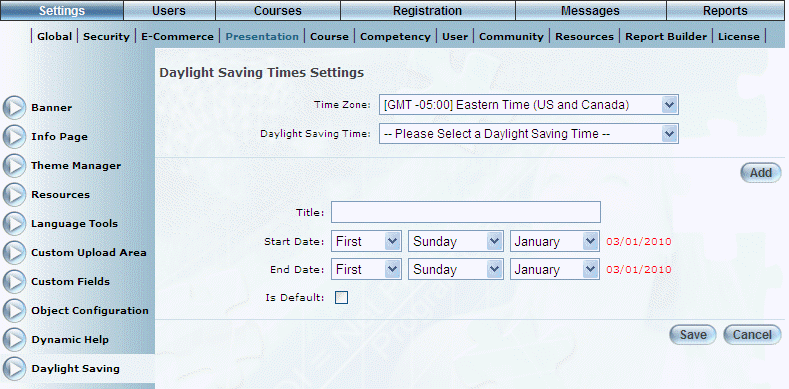
The following screen is displayed:
Adding a Daylight Saving Time Entry to a Time Zone
4. In the Title field, provide a name to the daylight saving time entry that you are creating.
This will help distinguish it from other entries when selecting them for users and sessions.
5. Use the Start Date drop-down lists to indicate when the daylight saving entry time will start.
6. Use the End Date drop-down lists to indicate when the daylight saving entry time will end.
This date must be later than the start date. The start and end dates always fall within the current year.
7. Check the Is Default box to indicate that the selected daylight saving entry will be the default value for the selected time zone.
This value determines the entry that will be selected for sessions and/or users when importing daylight saving time entries through applicable scripts (done outside of the user interface). This provides a quick and convenient of setting the daylight saving time entry for multiple sessions and/or users in one step.
Within the user interface, the default selection is identified by an asterisk at the beginning of the entry in the Daylight Saving drop-down lists.
8. Click Save.
Your entry will be displayed in the Daylight Saving Time drop-down list at the top of the screen for the associated time zone.