Introduction
Use this module to specify taxes that will be eligible to be applied when users within the selected community purchase a learning activity.
Taxes are applied when a user’s address matches the available taxes for the user’s community. This is based on the user’s billing address specified at the time of purchase or the user’s work address if no billing address is provided. For example, if only a Manitoba provincial tax is applied for a community and a user in that community with an Ontario billing address purchases a session, no provincial taxes will be applied to that purchase.
Note: National taxes for countries without provinces or states can be created by using the name of the country as both the country name and the province/state name. The billing address for a purchase must match the country and province/state to have the tax applied.
Taxes must be enabled on the Community E-Commerce Settings screen before these tax settings will be considered.
· If the Tax Exemption box is checked for a community in Community E-Commerce Settings, all tax settings defined for that community will be ignored.
· You can override tax settings on a per-session basis. See Configuring E-Commerce Taxes for a Session for more details.
Note: Harmonized sales tax (HST) is treated as a federal tax.
Procedure
1. From the Settings menu, select E-Commerce, then Tax Settings.
Note: This left-hand side menu is displayed when security setting 310: Side Menu – Tax Settings is enabled.
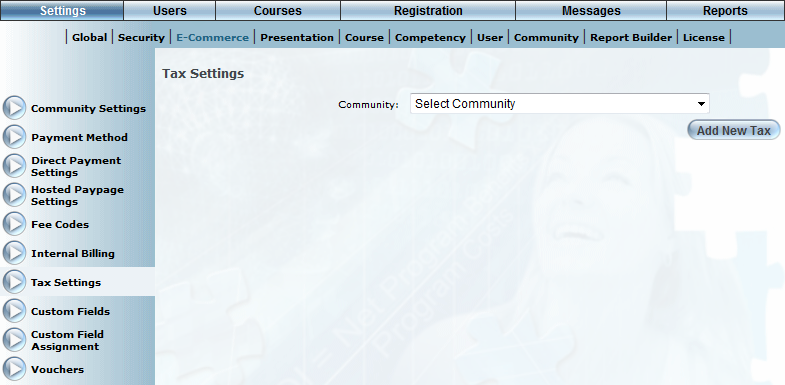
The Tax Settings screen is displayed:

Tax Settings – Selecting a Community
2. You can perform the following operations:
· Click Add New Tax to create a new tax.
· Use the Community drop-down list to select a community whose tax settings you want to manage. The rest of this procedure assumes you are selecting a community.
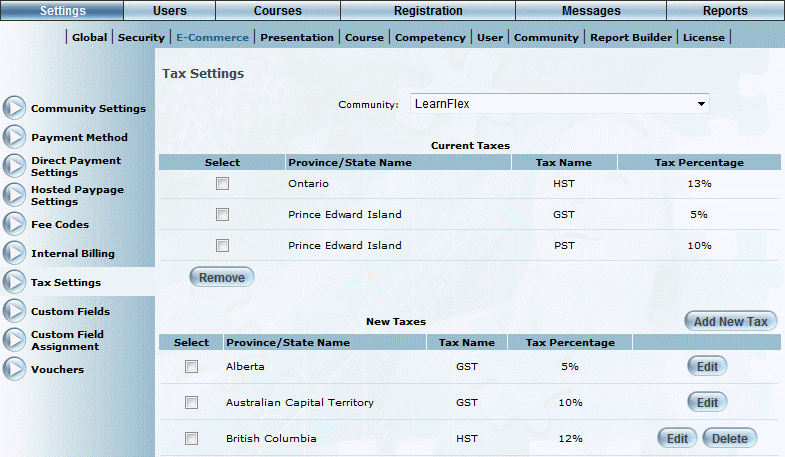
The screen is re-displayed:

Managing Tax Settings
This screen is divided into two sections: the Current Taxes section lists all those tax settings that currently apply to your community. The New Taxes section lists those tax settings that have been created in the system.
Note: The value in the Tax Name column refers to the tax label displayed when a user purchases a session, and in Order Management.
3. You can perform the following operations:
· To add a province/state name to the Current Taxes section for the community, check a box in the New Taxes section and click Add at the bottom of the screen. These taxes will be eligible to be applied to learning activity purchases.
· To remove a tax from being applied to the community, check its box in the Current Taxes section. Click Remove.
Note: Enable security setting 864: Tax Management to display the Add New, Edit, and Delete buttons listed below.
· To create a new tax, click Add New Tax.
· To edit an existing tax, click Edit.
· To delete a tax from the system, click Delete. You will not be prompted to confirm the operation.
Note: A tax can only be deleted if it is not in the list of Current Taxes for any communities.