Procedure
1. From the Settings menu, select Course, then Course Schema.
Note: This menu is available when security setting 793: Course Schema is enabled.
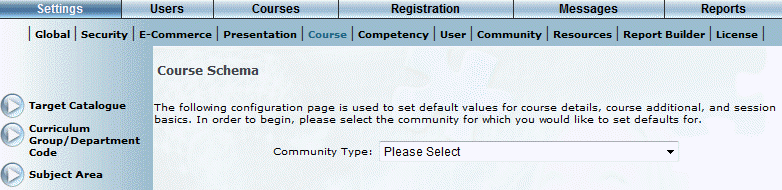
The Course Schema screen is displayed:
Course Schema
2. From the Community Type drop-down list, select the community for which you would like to create a course schema.
The screen refreshes and the configuration settings are displayed.
3. Access the Session Basics section of the screen, as shown below:
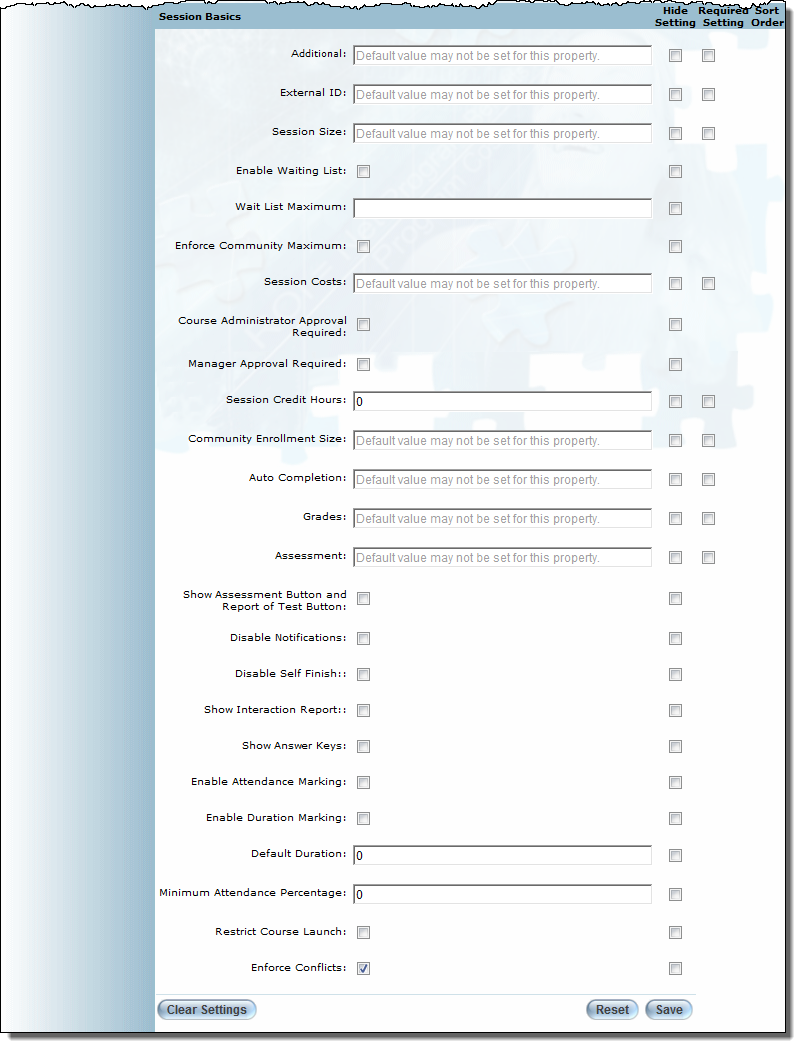
Course Schema - Session Basics Settings
4. You can perform the following operations from this screen:
· When available, select or enter default values for the configuration settings. The default values will apply to all members of the selected community.
Note: Default selections are not available for the following settings: Additional, External ID, Session Size, Session Costs, Community Enrollment Size, Auto Completion, Grades, and Assessment.
For details about each of the fields in this section, see Editing Session Details.
· In the Hide Setting column, check the boxes beside those settings you want to hide on the Session Basics screen.
· In the Required Setting column, check the boxes beside those settings you want to be mandatory on the Course Basics, Sessions Basics, and Course Additional screens.
Note: Fields that are mandatory by default do not have boxes beside them.
· In the Sort Order column, place numbers into fields to determine the order that items should appear on the Courses/Registration: Catalogue screen, the Course Summary Report, and on the Preview Course Settings screens.
Hint: The Sort Order column contains many blank boxes. These boxes hold numbers, and allow you to establish a hierarchy based on the number order. The lower the number, the closer to the top of the screen the item will be. For example: 1 will be the first item listed on the screen, 2 will be second item listed on the screen, 3 will be third, and so on.
Note: To set all settings to default, place a 0 in each box.
Note: If you place the same number beside two different items, the hierarchy of those two items will return to their default order.
Note: The sort order options do not apply to the Course Basics, Session Basics, or Course Additional screens.
· Click the Save button to save your changes.
· Click the Reset button to undo any changes made since the last time the screen was saved.
· Click the Clear Settings button at the bottom of the page to delete any selections made for the selected community.
Note: This button will also delete the selections in the Course Basics and Course Additional sections of the screen.