Introduction
Use this section to add or edit links or headers that are viewable on the Links screen in User mode.
Procedure
1. From the Resources Administration screen, either:
· Click Add to create a new header or link, or
· Select an existing header or link and click Edit.
Both options will take you to the same screen, the only difference being that when editing a link or header some information will already be completed.
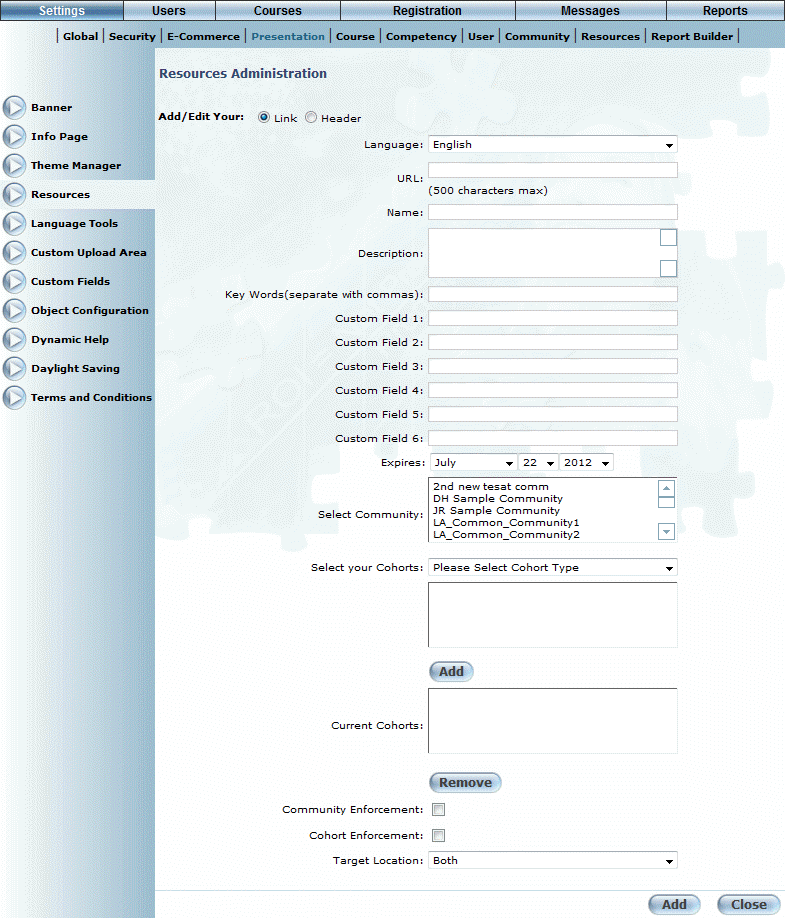
The following Resources Administration screen is displayed:
Resource Administration: Add/Edit Links and Headers Screen
This screen displays the options and settings that you can use to add or edit a link or header.
2. Use the Language drop-down list to select the language in which the header or link will appear.
The languages that are available depend on the configuration of LearnFlex.
3. In the URL field, enter a URL or web address.
Headings and sub-head do not require a URL.
4. In the Name field, enter the name of your header or link.
This name will appear on the Links screen in User mode as well as search criteria for the SkillSoft search function.
5. In the Description box, enter a brief summary of the header or link.
This description will appear on the Links screen in User mode as well as search criteria for the SkillSoft search function.
6. In the Key Words field, enter text that will be used in the SkillSoft search to search for links and headers within LearnFlex.
7. Enter custom field values as needed.
You may add up to six custom fields to your heading or link entry. These custom fields maybe used to input metadata or other reportable information into the entry. The custom fields may be reported on from within Report Builder and used as search criteria for the SkillSoft search function.
8. Use the Expires fields to set an expiry date for any links or headings that you create.
This expiry date applies to the last possible time that the Link will be available to users.
9. Use the Select Community list to select the communities that will have access to the links.
The communities currently permitted to see this resource will already be selected in the Select Community box. Communities who are not selected on this screen will not be able to see the link. This allows you to be selective about what resources particular communities can use during their training.
10. Use the Select your Cohorts drop-down list to select the cohorts that will have access to the links.
Cohorts who are not selected on this screen will not be able to see the link. This allows you to be selective about what resources particular cohorts can use during their training.
Hint: Use the Remove button to remove any unwanted cohorts from the Current Cohorts list.
11. Check the Community Enforcement box to allow only the above selected communities to see this link or header.
12. Check the Cohort Enforcement box to allow only the above selected cohorts to see this link or header.
Note: If you do not check either/or this box or the Cohort Enforcement box, then all of your communities and/or cohorts will have access to the resource you are creating/editing.
13. Use the Target Location drop-down list to indicate if the resource header and/or link should be available to users in desktop LearnFlex (Desktop), LearnFlex Mobile (Mobile), or on both (Both).
Note: Some resources, like Adobe Flash files, may not run or display properly in a mobile browser.
14. Click Save to save your changes.
15. Click Close to exit this screen and return to the main Resource Administration screen.