Procedure
1. From the Settings menu, select Resources, then Resources.
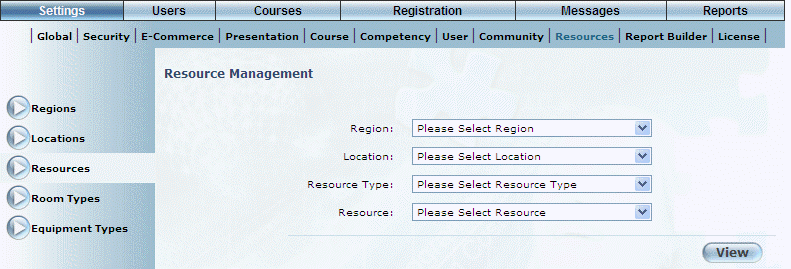
The following screen is displayed:
Resource Management
2. Use the Region and Location drop-down lists to select the area where the resource is going to be added.
3. Use the Resource Type drop-down list to select Rooms.
4. Click Add.
The following screen is displayed:
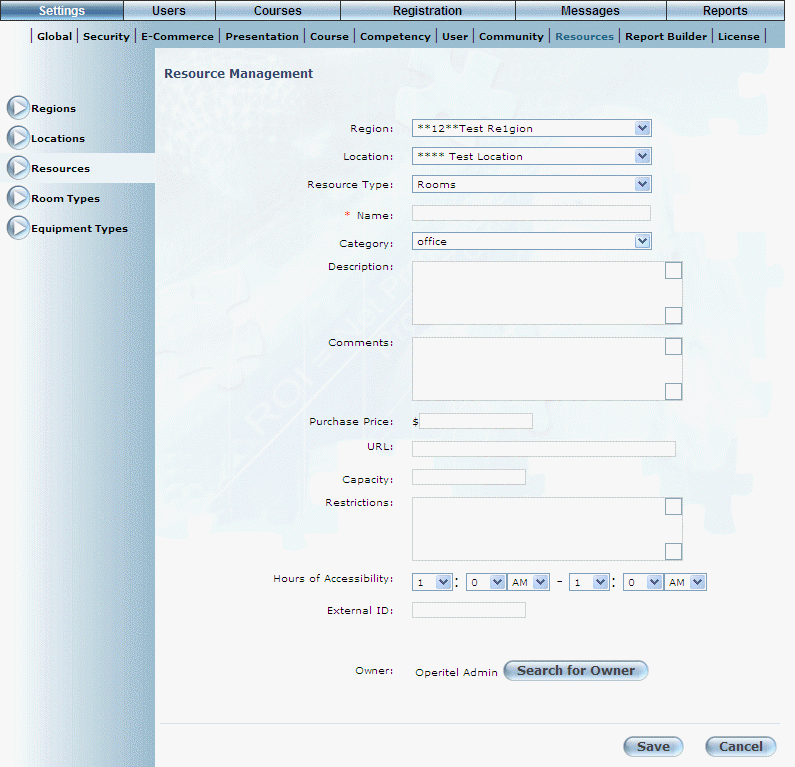
Managing Room Resources
5. In the Name field, enter the name of the room resource you are adding to the region-location.
6. Use the Category drop-down list to select the type of room.
The values in this list are defined in the Room Types module.
7. In the Description text box, enter a brief description of the room resource you are adding.
8. In the Comments box, enter any additional details about the room resource.
9. In the Purchase Price field, enter the necessary purchase price.
10. In the URL field, enter the URL for the resource.
11. In the Capacity field, enter the maximum number of people who can fit into the room resource.
You must enter a number in this field.
12. In the Restrictions text box, enter any restrictions about this room resource.
13. Use the Hours of Accessibility drop-down boxes to indicate when this room resource is available for booking.
The two values must be different, and the first value must be earlier than the second value.
14. In the External ID field, enter a value that can be used for external reporting.
15. You can perform the following operations from is screen:
· Click the Manage Blackout Dates button to specify when this resource will not be available for booking.
· Click the Search for Owner button to locate an owner.
· Click Save to keep your changes.