Introduction
You can set blackout dates for a selected resource. A blackout period for a resource indicates the dates and times in which that resource in not available. If a resource has a blackout period associated to it, it will not be available for booking on any learning activity.
Procedure
1. From the Settings menu, select Resources, then Resources again.
2. Use the drop-down lists to select the resource that you want to manage.
3. Click Manage Blackout Dates.
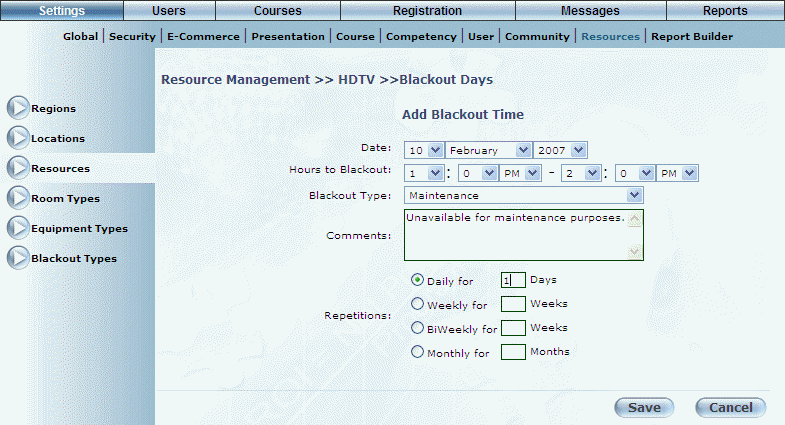
The Blackout Days screen is displayed:
Adding Blackout Times
4. Use the Date drop-down lists to specify the day when the resource will not be available.
5. Use the Hours to Blackout drop-down lists to specify the hours on the selected day that should be blacked out.
6. Use the Blackout Type drop-down list to specify the reason for the blackout.
These values are defined in the Blackout Type module.
7. In the Comments text box, enter any details about the blackout date for the resource.
8. In the Repetitions section, specify the time interval and the number of intervals when this blackout should repeat for the selected resource.
If you do not specify repetitions, then the blackout time will occur only once.
9. Click Save to keep your changes.
A summary of the blackout information is displayed at the top of the screen:

Blackout Date Information
10. You can perform the following operations for the blackout date:
· Click Edit to change its details.
· Click Delete to remove the blackout date from the resource.