.png)
Introduction
Use this option to upload a new version of content for a course when the content was originally uploaded using the existing upload engine.
Note: If the name of the file you are uploading does not match the file that was originally uploaded, you need to the use the Upload New Content option.
Procedure
1. From the Courses menu, click Add New Course.
The Course Basics screen is displayed.
2. Click Course Content.
3. After selecting the session, language, and target platform, select the Upload New Version option button.
The following screen is displayed:
Upload a New Version (Details)
By looking at the image above, this course already has a SCORM 1.2 course uploaded, and by uploading a new version, the version number is incremented to 2 with a new time stamp as well.
4. Use the Language drop-down list to specify the language in which the course will be displayed.
5. In the Title field, enter the title of the new version that you are uploading.
6. In the Description box, enter a summary of the new version.
In the Version Information section:
7. In the Comments box, enter any comments about the version of the session that you are uploading.
In the Version Settings section:
8. In the Height and Width fields, specify the default size of the window where the course content will be displayed.
9. Check the Allow Window Resizing box if you want the user to be allowed to change the size of the window.
10. Check the Allow Scrollbars box to display scroll bars in the window where the course content is displayed.
11. Check the URL only box if only a URL should be displayed.
12. In the Start/Configuration Page field, enter the file name of the first page in the course content.
13. Once the new information has been added, click the Save and Upload button (not shown).
You are taken to a screen, shown below, where you can upload the new version.
.png)
Uploading a New Version (File)
14. After browsing and selecting the new course package, click the Upload and Configure button.
The following screen is displayed:
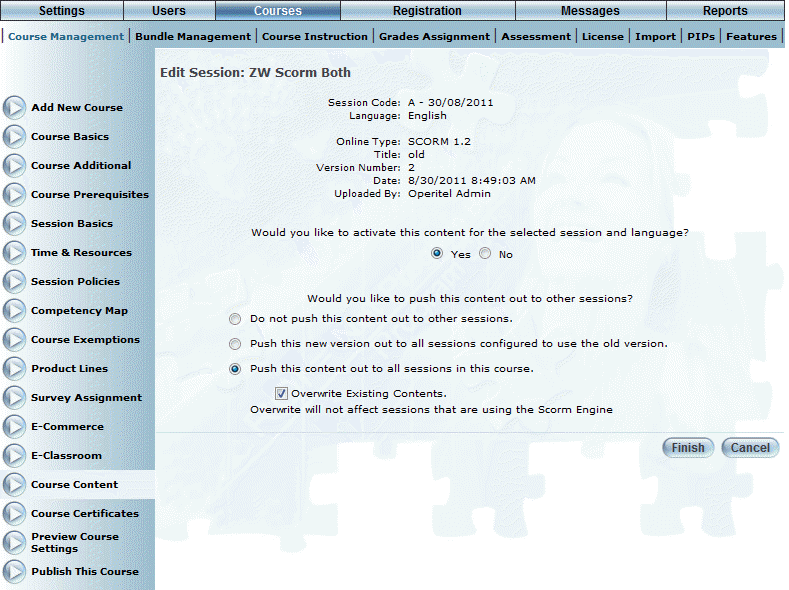
Configuring Course Content
15. In the first section, select the option button to indicate if you want to activate the content for the session (Yes) or not (No).
16. In the second section, select an option button to indicate if you want this session's content to be available to other sessions.
· Content is not pushed out to other sessions.
· Push the new content out to all sessions configured to use the old version.
· Push the new content out to all sessions in the course. If you select this option button, then an additional check box is displayed.
17. Check the Overwrite Existing Contents box if you want to override existing course content with the selected course content.
18. Click Finish to save your changes.