Introduction
Session (class) messages are sent directly to the students in a particular, specified, class. Recipients will receive the message immediately in their Message Centre and email.
Procedure
1. From the Messages menu, select Add Automated Message.
2. Select Session (class) from the left-hand side menu.
Note: This left-hand side menu is displayed when security setting 189: Session is enabled.
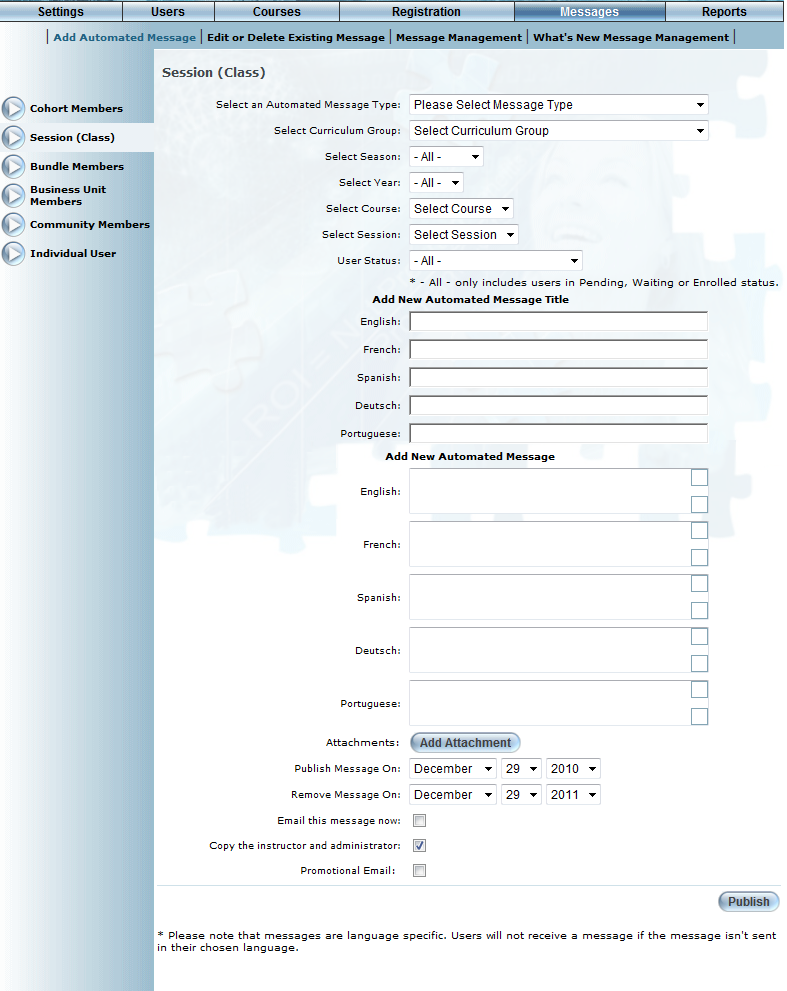
The following screen is displayed:
Sending a Message to Session Members
3. Use the Select an Automated Message Type drop-down list to select the type of message you are sending.
4. Use the Select Curriculum Group drop-down list to choose the curriculum group that your course is using.
This selection filters the values available in the Select Course drop-down list (below).
5. Use the Select Season and Select Year drop-down lists to filter the values in the Select Course drop-down list (next).
6. Use the Select Course drop-down list to select the course who registrants will receive the automated message.
This selection determines the values in the Select Session drop-down list (next).
7. Use the Select Session drop-down list to select the session that will receive the automated message.
8. Use the User Status drop-down list to send the message to all users (consists of those with a Pending, Waiting, or Enrolled status), or only those users with one selected status.
9. In the Automated Message Title section, enter the title of the message in each language as needed.
This value is required.
10. In the Automated Message section, enter the body of your message in each language as needed.
11. Click the Attachments button to attach up to three files to this automated message.
12. Use the Publish Message On drop-down lists to select the month, day, and year when the message should be published to users.
13. Use the Remove Message On drop-down lists to select the month, day, and year when the message should be removed.
14. Check the Email this message now box to send this message to both the users’ Message Centre and to their email (as specified in their Basic Information).
15. Check the Copy the instructor and administrator box if you want to send a copy of this message to both the session instructor and administrator.
16. Check the Promotional Email box to flag this message as promotional.
Note: Users can be opted out of receiving messages flagged as promotional from the Profile: Basic Information page.
17. Click the Publish button to finish.