Introduction
Use this feature to send automated messages to those users within one or more business units.
Procedure
1. From the Messages menu, select Add Automated Message.
2. Select Business Unit Members from the left-hand side menu.
Note: This left-hand side menu is displayed when security setting 190: Business Unit Members is enabled.
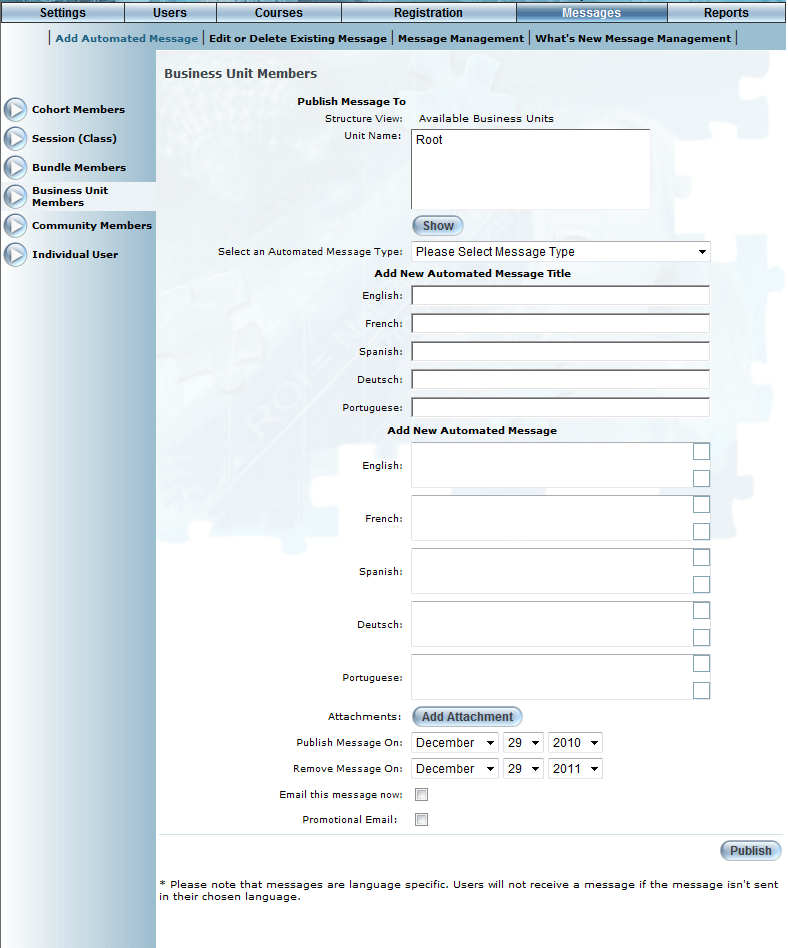
The following screen is displayed:
Sending a Message to Business Unit Members
3. To navigate the business unit’s structure, use the links that appear above the Unit Name list to advance up a level, and select a business unit and press the Show button to move down a level.
4. Navigate to the chosen business unit by using the links and the Show button under the Publish Message To section.
5. Use the Select an Automated Message Type drop-down list to select the type of message you want to send to the business unit members.
6. In the Automated Message Title section, enter the title of the message in each language as needed.
This value is required.
7. In the Automated Message section, enter the body of your message in each language as needed.
8. Click the Attachments button to attach up to three files to this automated message.
9. Use the Publish Message On drop-down lists to select the month, day, and year when the message should be published to users.
10. Use the Remove Message On drop-down lists to select the month, day, and year when the message should be removed.
11. Check the Email this message now box to send this message to both the users’ Message Centre and to their email (as specified on the Basic Information screen).
12. Check the Promotional Email box to flag this message as promotional.
Note: Users can be opted out of receiving messages flagged as promotional from the Profile: Basic Information page.
13. Click the Publish button to finish.