Introduction
Use this section to indicate the name of the heading (menu) you want to appear in User mode.
This is the first step in creating the dynamic link headings and its links. For a list of the complete list of the configuration steps, see Dynamic Help Overview.
Note: If you change the name of a dynamic link heading, you will also need to ensure that the change has also been made to its custom link name and URL.
Procedure
1. From the Dynamic Help Administration screen, click Add New Link Heading.
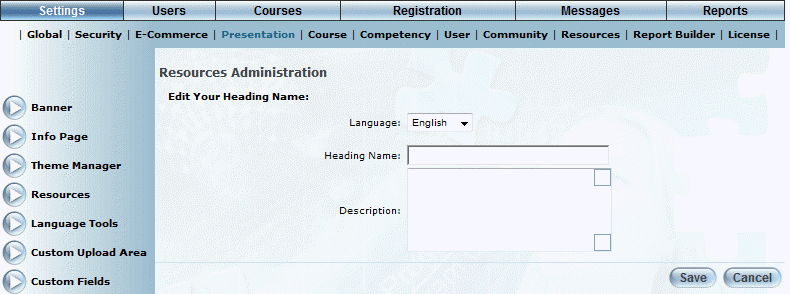
The following screen is displayed:
Edit Dynamic Link Heading Screen
2. Use the Language drop-down list to select the language where the link heading will be visible.
You can display a different link heading per language. The languages in this list are determined through a Client Setup global setting. Contact your LearnFlex representative for details.
3. In the Heading Name field, enter the name of the link heading.
This is the name that will be visible to users.
You can enter a maximum of 50 characters (alphanumeric). Spaces and special characters are accepted.
4. In the Description box, enter a brief summary of the dynamic link heading.
This description helps distinguish this heading from other headings in Admin mode.
5. Click Save to keep your changes.