Introduction
Use this section to present to users the terms and conditions to which they must agree after logging in but before accessing LearnFlex. Terms and conditions can be configured for each community and in each supported language within LearnFlex.
When the terms and conditions change, you can update them for each community and language.
Note: When the terms and conditions are changed for a community in any language, members of that community will need to re-accept them before they can proceed with their LearnFlex sessions.
Procedure
1. From the Settings menu, select Presentation.
2. Select Terms and Conditions from the left-hand side menu.
Note: This option is displayed only when security setting 840: Terms and Conditions is enabled.
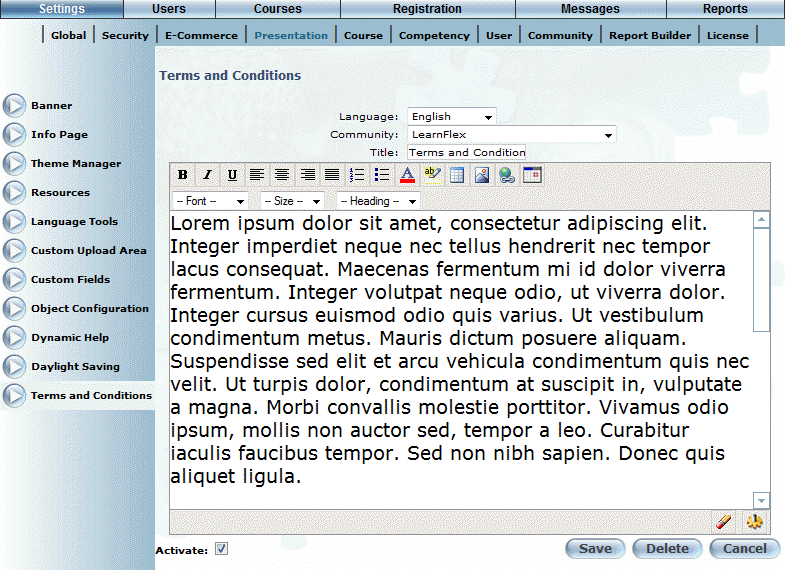
The following screen is displayed:
Terms and Conditions
3. Use the Community drop-down list to select the community to which the terms and conditions will be displayed.
4. Use the Language drop-down list to select the language in which you want to present the terms and conditions.
This list is displayed above the Community drop-down list (above) once a community is selected.
Note: The first terms and conditions for any community are created in the default language.
5. In the Title field, enter the title of the terms and conditions.
This value is for information purposes only and is not displayed to users.
6. Use the main text box to enter and customize the text of the terms and conditions.
You can enter free-form text, then use the drop-down lists to change the font type, size, colour, and so on. Additionally, you can use the tool bar (just above the drop-down lists) to apply more customizations to your text, centre your content, and add links, table, graphics, and more.
Hint: Hover over each button in the tool bar to see its tool tip.
Note: The
background colour icon only changes the background colour of the editor,
and not for the selected page. To change the background colour of the
page, you will need to edit its HTML code (which you can access by clicking
the View HTML icon ![]() ,
located in the bottom right-hand corner of the editor screen).
,
located in the bottom right-hand corner of the editor screen).
7. Use
the Remove Formatting
(![]() ) button to remove all formatting from
the selected text.
) button to remove all formatting from
the selected text.
Note: You must select the text from which you want to remove the formatting before using this feature.
8. Use
the View HTML
(![]() ) button to format the text using HTML.
) button to format the text using HTML.
9. Check the Activate box to make the terms and conditions available to users.
If you do not check this box, your content will not be displayed.
10. Click Save to keep your changes.