Introduction
This report provides information about the type of issues that have been submitted to the Help Desk during a given period of time.
Procedure
1. From the Reports menu, select Standard, then Custom.
2. Click the Help Desk Report link.
Note: This link is displayed when security setting 683: Help Desk Report is enabled.
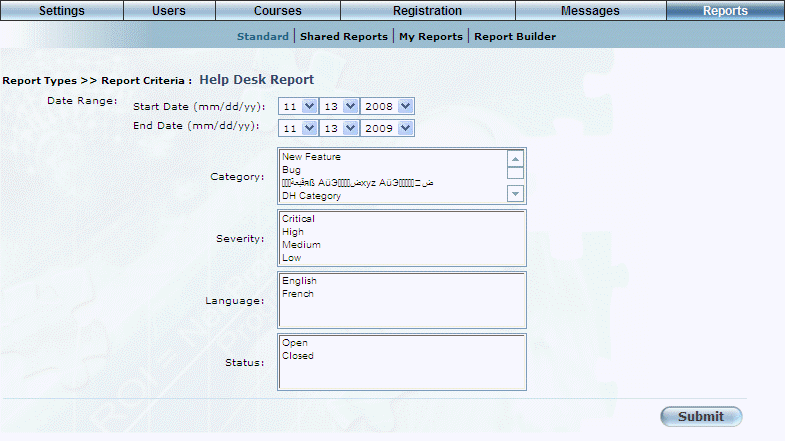
The following screen is displayed:
Help Desk Report - Parameters
3. Use the Date Range - Start Date and End Date drop-down lists to specify the date range of your report results.
4. Use the Category list box to filter your results by one or more help desk categories.
5. Use the Severity list box to filter your results by one or more help desk severities.
6. Use the Language list box to filter your results by one or more languages.
7. Use the Status list box to filter your results by one or more help desk ticket statuses.
8. Click Submit.
The following screen is displayed:
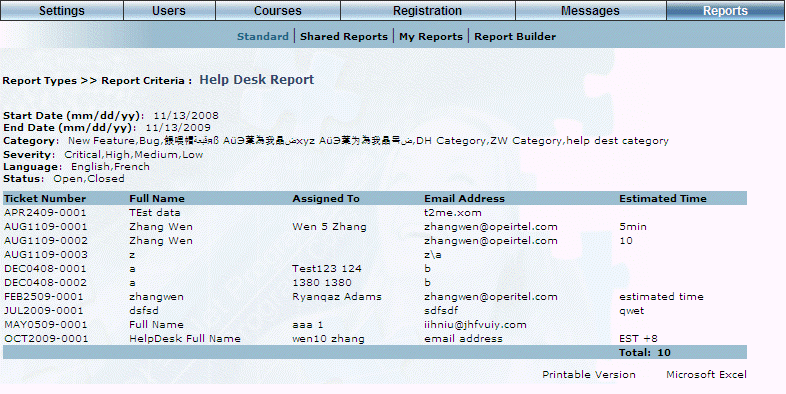
Help Desk Report - Results
The following columns of information are displayed
· Ticket Number: Displays the number of the help desk ticket.
· Full Name: Displays the full name of the user who entered the help desk ticket.
· Assigned To: Indicates to whom the help desk ticket is assigned.
· Email Address: Displays the email address of the person who entered the help desk ticket.
· Estimated Time: Displays the estimated time to complete the ticket.
9. You can perform the following operations from this screen:
· Click Printable Version to generate a version of the results that you can print.
· Click Microsoft Excel to display the results in Microsoft Excel.