Introduction
To help you get started using Report Builder, this document will walk you through creating a simple audit report that you can use to review administrative changes, such as a user’s move to a different business unit, name changes, and so on, made in LearnFlex for a specified date range. This will familiarize you with the basic features used to create a report.
Note: Addressing all reporting capabilities, menus, and lists of Report Builder is beyond the scope of this document.
Step One: Accessing Report Builder
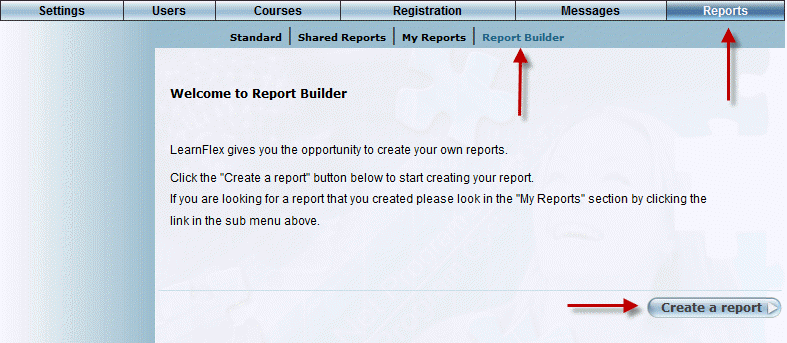
1. After logging into your LearnFlex administrator’s account and accessing Admin mode, navigate to the Reports menu, then the Report Builder sub-menu.
2. Click Create a Report.
Step Two: Making Field Selections
Field selections are the areas within LearnFlex from which data will be retrieved for the report. Making field selections to retrieve relevant data is essential to creating a good report. Some objects are interdependent which will allow you to choose fields from various tables for one report, but will also require the selection of fields from one table in order to use fields from another.
1. Make sure Select Fields is selected in the left-hand side menu.
2. Use the drop-down Object menu to select the Auditing table.
All of the fields available in the Auditing table are displayed:
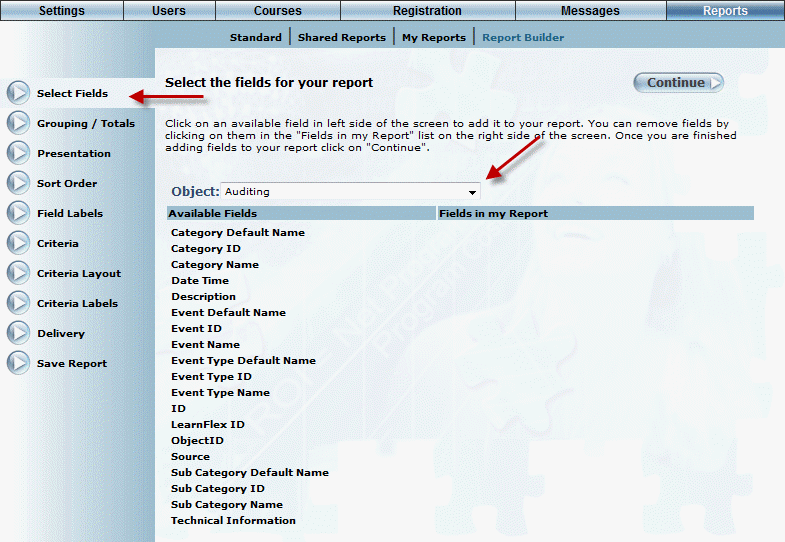
3. Click the names of fields you would like to review data for. For this report choose the following fields:
· Category Name to return data about the type of administrative change; Business Rule, Security, and so on.
· Date Time to see when the changes were made.
· Description to see exactly what changes were made to the values.
· Event Name to see which actions were performed on the values.
· Source to see the internal ID numbers of the values changed.
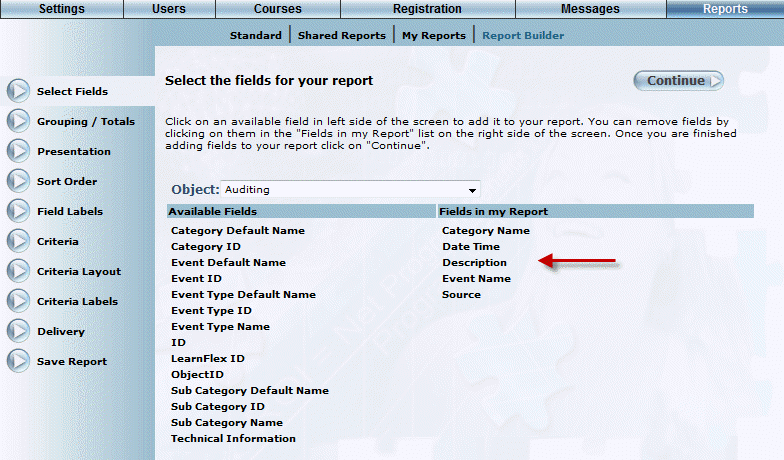
The fields are moved from the Available Fields column to the Fields in my Report column.
4. Use the Object menu to select the User table. From the list of available fields, select User Name to add it to the report. This selection will retrieve the user names of administrators making changes in LearnFlex.
Step Three: Selecting Report Criteria
The criteria you select will be used to determine the parameters for your report from the same objects (tables) used to select the fields for your report. These are subject to the same interdependencies the field selections are.
![]()
1. Use the Object drop-down to select Auditing.
2. Use the Field drop-down to select Date Time to create a specified date range from which the data in the report will be pulled.
3. Use the Comparison drop-down to select greater than or equal to.
4. Check the Display flag to make this parameter active, then click Save.
Note: The greater than or equal to and less than or equal to selections will include the beginning and end dates entered as parameters. The greater than and less than selections will only pull data for the dates in between.
5. Repeat the steps above, using the Comparison drop-down menu to select less than or equal to for the second parameter.
6. Check the Display flag to make this parameter active, then click Save.
Step Four: Saving the report
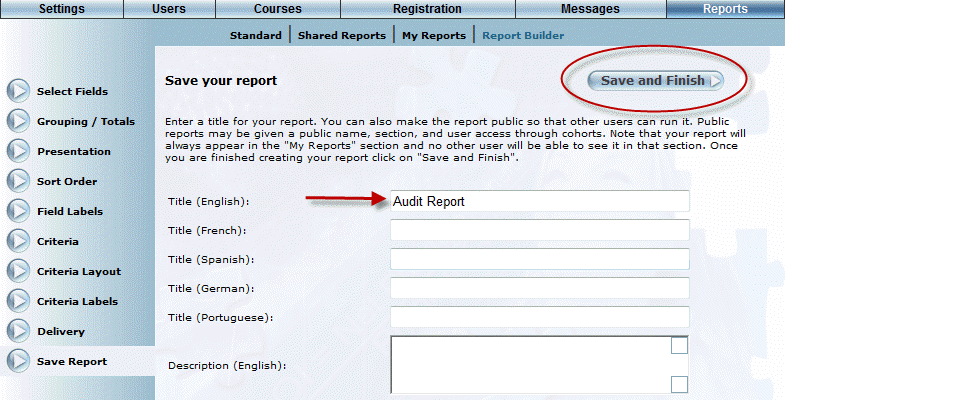
1. Select Save Report in the left-hand side menu.
2. Enter a title for your report in the title text box.
3. Click Save and Finish.
The report will now appear in the My Report sub-menu.
Step Five: Run the Audit Report

1. Navigate to the Reports menu, then the My Reports sub-menu.
2. Make sure that Run is selected in the drop-down menu beside your report, then click Go.
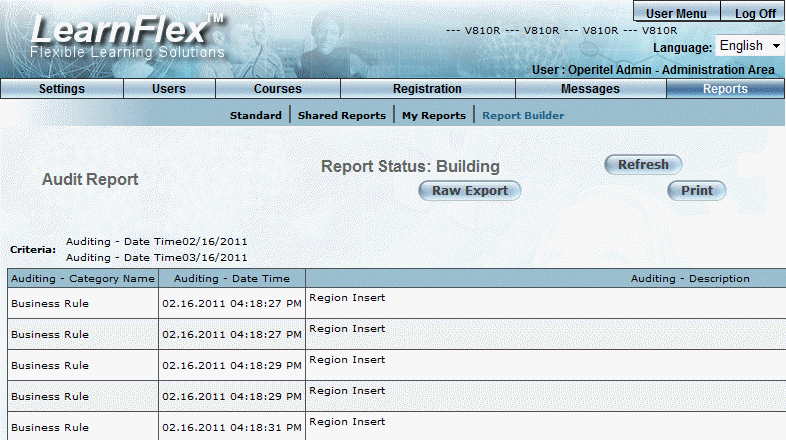
3. Select a beginning and end date in the date drop-down lists, then click Run Report.
Congratulations! You have successfully created an audit report in Report Builder!