Introduction
Changing a blackout period allows users in a particular business unit to essentially put their training on hold. This can be useful for those who have, for example, 30 days to complete training but get sidetracked by vacation time, and so on. The Blackout tool allows users to “suspend time”.
Procedure
1. From the Settings menu, select User, then Business Unit.
The Business Units screen is displayed.
2. Select the business unit that you want to manage.
3. Click Blackout Period Scheduling (bottom of the screen).
Note: Security setting 567: Business Unit Modifications to Blackout Periods - Button must be enabled to access this button.
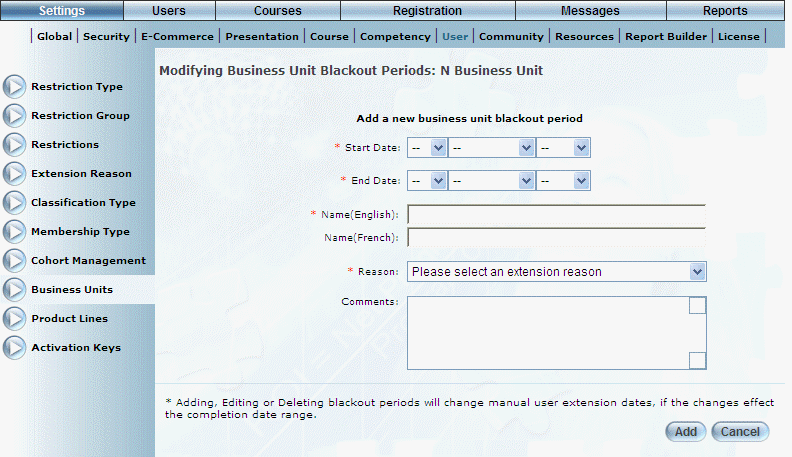
The following screen is displayed:

Scheduling Blackout Period for a Business Unit
4. Use the Start Date drop-down fields to indicate the day, month, and year when the blackout period will start.
The start date must be earlier than the end date.
5. Use the End Date drop-down fields to indicate the day, month, and year when the blackout period will end.
6. In the Name (English) field, enter the name of this blackout period.
7. Use the Reason drop-down list to select the reason for the blackout period.
These values are created in the Extension Reason module. This value is required.
8. In the Comments field, enter any other comments about this blackout period.
This value is required only if you selected Other from the Reason drop-down list.
9. Click Add to keep your changes.
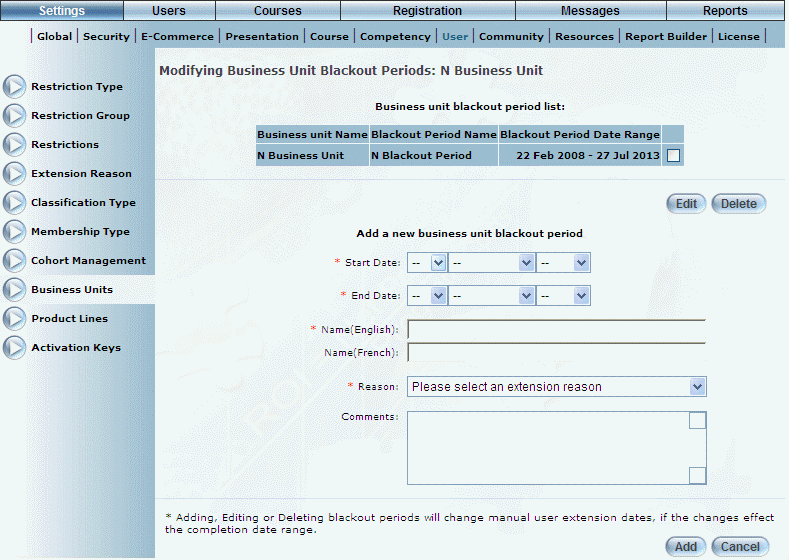
The screen is re-displayed with additional information:

Managing Blackout Periods for a Business Unit
10. You can perform the following operations from this screen:
· In the upper part of the screen, check the box of the existing blackout period that you want to manage. Click Edit to change its values or Delete to remove it.
· Enter information in the Add a New Business Unit Blackout Period section to add another blackout period for this business unit.