Introduction
Use this section to add a workshop to a selected session.
Procedure
1. Make sure that you are at the Time and Resources screen.
2. Use the drop-down list to select the session that you want to manage, then scroll to the Date and Time section.
3. Click Assign next to Assign Workshops.
The following screen is displayed:
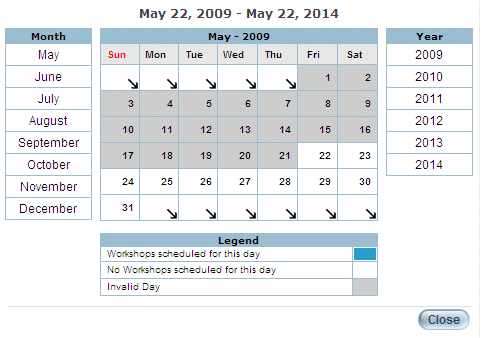
Workshop Times Calendar
Note: You can also schedule a workshop from the Session Basics screen.
Use this section to allow users to register for conferences and allow administrators to administer conferences. Course administrators can create multiple workshops for a particular session or create a new workshop within a new session. They can also pre-select certain individuals and register them for a specific workshop.
4. Click the date when the workshop will occur.
The pop-up window is re-displayed:
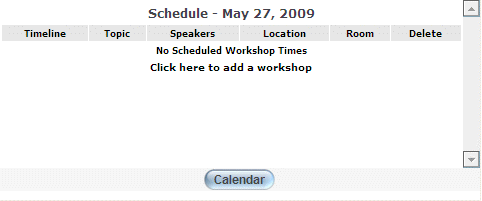
Viewing a Workshop Schedule
This pop-up window indicates if any workshops have been scheduled for the selected day.
5. Click the Click here link to schedule information about the workshop.
The pop-up window is re-displayed with additional information:
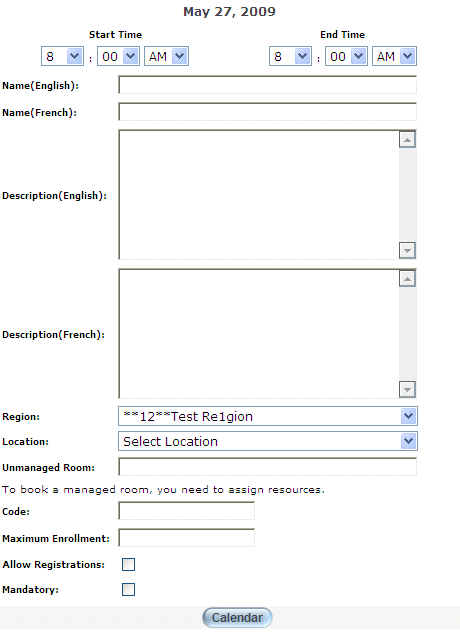
Specifying Workshop Details
6. Use the Start Date drop-down lists to specify when the workshop will start.
7. Use the End Date drop-down lists to specify when the workshop will end.
8. In the Name field, specify the name of the workshop.
9. Optionally, enter the name of the workshop in other languages as needed.
10. In the Description text box, provide a summary of the workshop.
11. Use the Region drop-down list to specify the region where the workshop will take place.
12. Use the Location drop-down list to specify the location where the workshop will take place.
13. In the Unmanaged Room field, specify the room where the workshop will take place.
Note: You need to specify resources for managed rooms only.
14. Use the Code field to enter the code of the workshop.
15. In the Maximum Enrollment field, enter the maximum number of people who can enroll in this workshop.
16. Check the Allow Registration box if you want to allow registration.
17. Check the Mandatory box if the workshop is mandatory.
If a user registers for a course or conference that contains a mandatory workshop set by an administrator, he or she will automatically be registered for the workshop.
18. Check the Break-Time box if the workshop is a placeholder for a break.
19. Click Save.
The Assign Speaker pop-up window is displayed:
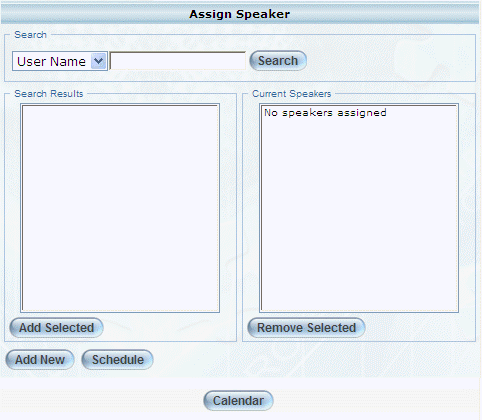
Assigning a Speaker to a Workshop
Use this window to specify those users who will be speaking at the workshop. This functionality for assigning speakers to a workshop is the same as for a session. Orphans cannot be selected as speakers at workshops.
20. Click Add New to add a new date and time for the workshop.
You will return to the pop-up window where you can enter values and check boxes.
21. Click Schedule.
The following pop-up window is displayed:
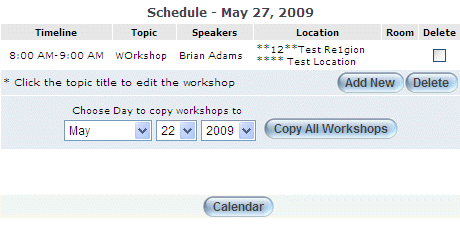
Managing Workshops
The workshop schedule indicates the timeline, the topic the speaker(s) involved, the location and the room where it will be taking place. The user will be able to examine the details of this conference within the learning plan and through the Message Centre.
22. You can perform the following operations from this pop-up window:
· Add New: Allows you to create a new workshop.
· Delete: Allows you to delete a selected workshop. To do this, check the boxes of those workshops you want to delete, then click Delete. Note: If ever the date of a workshop was to change, the administrator would have to delete the existing workshop and then create a new one with the revised date.
· Copy: Allows you to copy details of an existing workshop.