Introduction
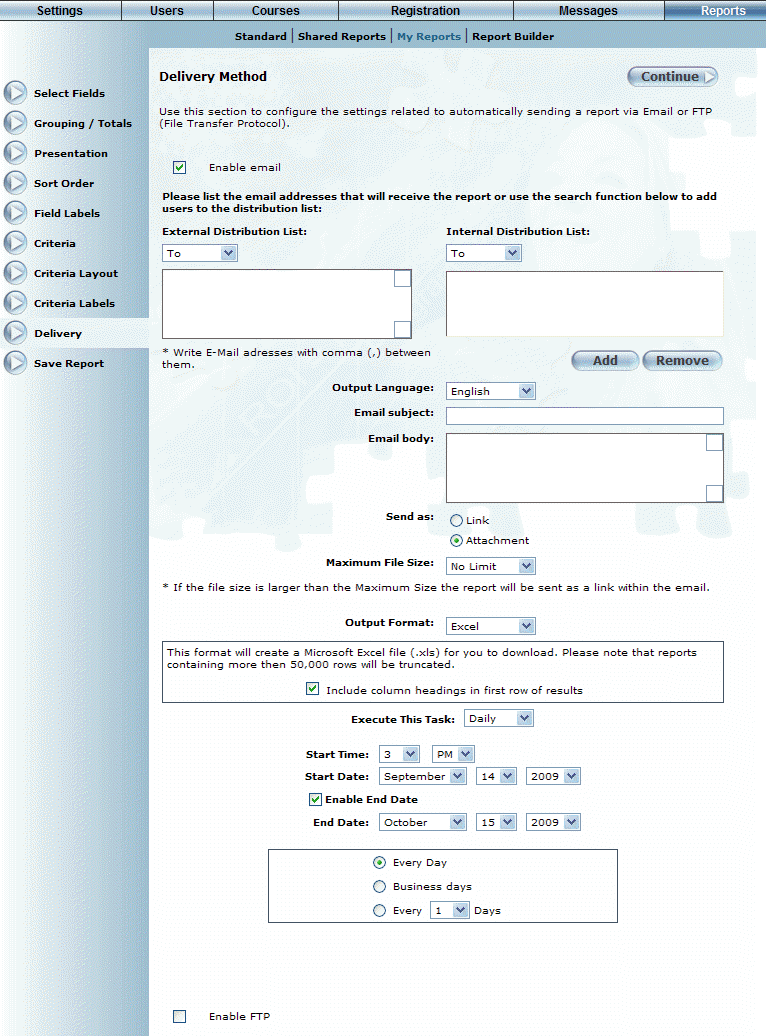
Use this section to configure the settings related to emailing a report. This delivery method allows you to send reports directly to recipients on internal and external distribution lists.
Some email clients will not accept large report attachments. If you want to send larger reports, consider using the FTP delivery method.
Procedure
1. After accessing Report Builder, select Delivery, then check the Enable Email box.
The following screen is displayed:
Delivery Method - Email Configuration
2. On the Delivery screen, check the Enable email box.
3. The report can be sent to users from an external distribution list and from users from an internal list. For the external list, simply enter the email addresses in the text box provided followed by commas.
4. For users from an internal distribution list, click the Add button to access a page used for searching users.
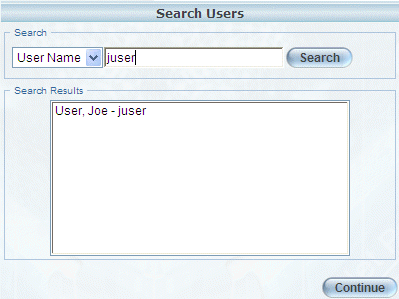
Searching for Users to Add to the Internal Distribution List
5. Once a user has been found, click on it and then click Continue.
The user has been added to the distribution list:
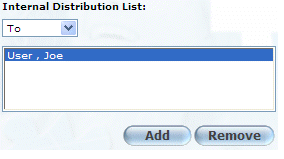
User Added to the Distribution List
6. To remove a user, click on the name and then click Remove.
7. You can then enter an email subject and the body message of the email.
8. Select the appropriate Send As option to send the report either as a link or as an attachment in the email.
9. Use the Maximum File Size drop-down list to specify the maximum size of the file for the email.
You can prevent over-sized attachments by restricting the file size.
Note: Scheduling reports refers to when the report will be sent out, NOT the date range of the data within the report. The data set is determined by criteria when the report is created or run.
10. The output format can be configured three different ways:
· Excel: This format will create a Microsoft Excel file (.xls) for download. Please note that reports containing more than 50,000 rows will be truncated. An option to include column headings in the report results exists.
· HTML: This format will create a Hyper Text Markup Language (.html) for viewing. Please note that reports containing more than 50,000 rows will be truncated. An option to include column headings in the report results exists.
· Plain text: This format will create a plain text file (.txt) for download. You can select a delimiter to be used to separate each field per row:
· Tab
· Comma
· Semicolon
· Pipe
You may also choose to surround each field value with additional characters if required. Please note the row delimiter is always a carriage return and line feed character:
· Nothing
· Double quotes
· Single quotes
· Parenthesis
· Square brackets
An option to include column headings in the report results exists.
11. The last step is to choose when exactly the task you have just configured needs to be executed.
· Never: By selecting never, the information you just entered will be saved and the task can be executed at later date.
· Daily: As seen in the next image, when you execute a task daily, you can specify the start time and the start date. In the case of the example above, the report will be run a 1AM every day beginning May 3rd and ending June 3rd. Setting an end date is optional. You also have the option of running the report every day, every business day (Monday to Friday) and every set number of days. Setting it at 2 days would mean that the report would be sent every other day.
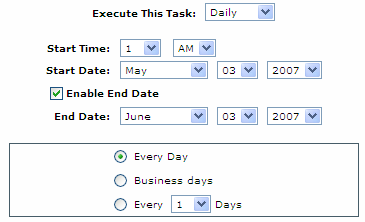
Executing a Task Daily
· Weekly: As seen in the following image, when you execute a task weekly, you can specify the start time and the start date. In the case of the example above, the report will be run a 1AM every day beginning May 3rd. Setting an end date is optional. You also have the possibility of skipping a few weeks (up to 10) and choosing what days of the week the report will be sent.
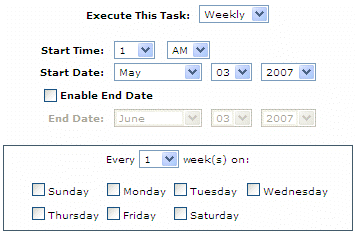
Executing a Task Weekly
· Monthly: As seen in the following image, when you execute a task monthly, you can specify the start time and the start date. In the case of the example above, the report will be run a 1AM every day beginning May 3rd. Setting an end date is optional. You also have the possibility to specify what months exactly you want this task to be executed on and indicate on what day of the month the task is to be executed or the first day (Monday thru Sunday) of the month.
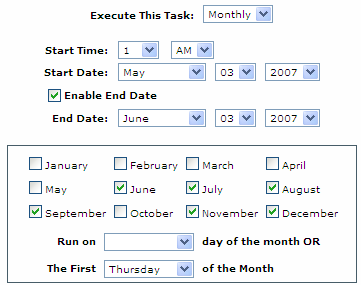
Executing a Task Monthly
· Once: The task can also be executed once only by simply choosing the start time and the start date as seen below.
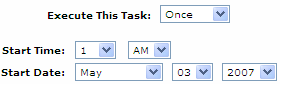
Executing the Task Once
12. Click Continue to proceed.