Procedure
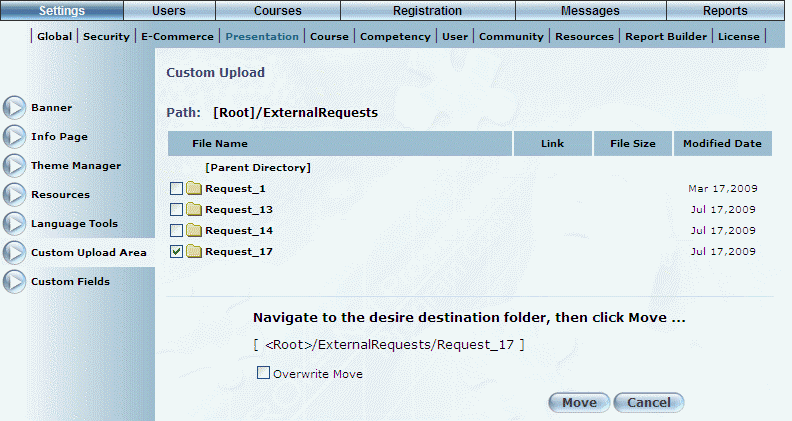
1. From the Settings menu, select Presentation, then Custom Upload.
2. Locate the file or folder that you want to move, then check the box to its left.
3. Click Move.
Note: This button is available when security setting 586: Custom Upload Move is enabled.
Note: The contents of folders name “Public” or “public” at the root level of the Custom Upload Area are accessible to users who are not logged into LearnFlex. Moving those folders will result in a denial of access to users who are not logged in.
The screen is re-displayed with additional information:
Moving Files and Folders
4. Navigate to the folder where you want to move the folder.
The destination folder will be displayed by the Path label. You must specify a different folder than the original.
5. Check the Overwrite Move box if you want the moved file to overwrite an existing copy of the file in the destination folder (if it exists).
Note: If you do not check this box, then uploading a file with the same name as one that already exists will produce an error.
6. Click Move.
The file will be moved to the destination folder.
![]()