Introduction
Use this section to specify the date and time when a session will take place.
Procedure
1. Make sure that you are at the Time and Resources screen.
2. Use the drop-down list to select the session that you want to manage, then scroll to the Date and Time section.
3. Click Assign next to Assign Session Times.
The following pop-up window is displayed:
Session Times Calendar
The session date and time selected previously are displayed at the top of the pop-up window.
Dates where the session has already been scheduled will have the day shown in blue (not shown above), days where the session cannot be scheduled (for example, because the days are outside of the session range) are shown grey, and eligible days are shown in white (as shown above).
4. To schedule a session, click on any eligible day.
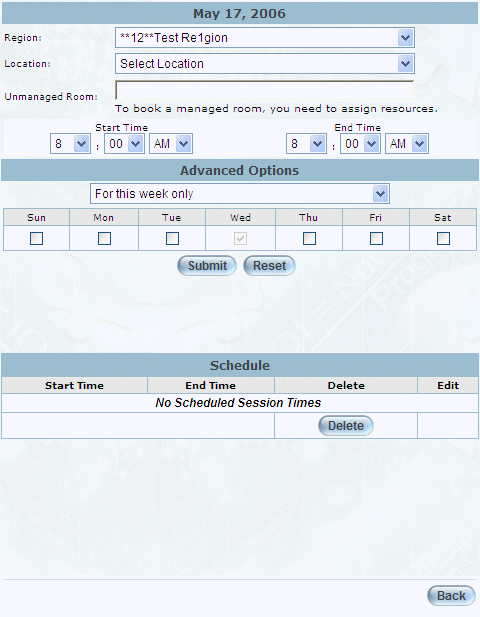
The pop-up window is re-displayed with additional information
Note: To book a managed room, you need to assign resources. This is explained below.
The Region and Location drop-down lists will be pre-selected. You may change them if desired.
5. Use the Region drop-down list to change the region where the session will take place.
6. Use the Location drop-down list to change the location where the session will take place.
7. In the Unmanaged Room field, specify the room number or name associated with the course.
8. Use the Start Time drop-down lists to specify the time when the session will start.
9. Use the End Time drop-down lists to specify the time when the session will end.
Note: The End Date value must be later than the Start Time value. Additionally, resources can be booked for only one day, where 12:00 am is considered the start of a new day.
10. Use the Advanced Options drop-down list to specify if the session time will be used for this week only, weekly, or bi-weekly.
This allows you to define an entire timetable in just a few mouse clicks.
11. Check the boxes of those days of the week when the session will take place.
12. Click Submit.
The session date and time will be displayed at the bottom of the pop-up window, beneath the Schedule heading.
13. You can perform the following operations:
· Click Back to return to the Booked Resource screen. You will return to the Session Times Calendar pop-up window where the newly booked session days will have changed to blue (indicating booked day).
· In the Schedule section, click the Edit button of the session time, region, or location that you want to change. You will be allowed to enter a new session time.
Note: This option deletes the existing session time and any booked resources associated with the session.
Note: You cannot change the session dates assigned. If you want to change session dates, delete the current selection and select new dates.
· In the Schedule section, check the Delete box of the session date and time that you want to remove and click Delete. You will be asked to confirm the deletion. Click OK.
· Add more session times using the Start Time and End Time drop-down lists.