Procedure
1. From the Employment Status screen, click Add.
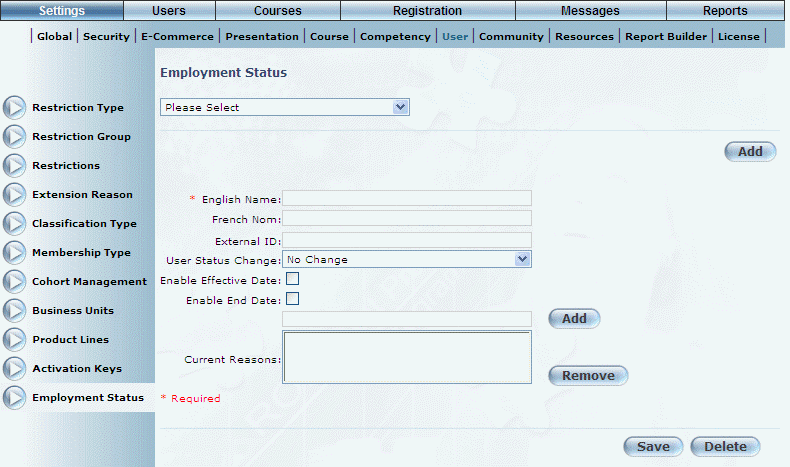
The following screen is displayed:
Adding an Employment Status
2. In the English Name field, specify the name of the employment status.
Optionally, enter the name of the employment status in other languages.
3. In the External ID field, specify the unique code that can be used for external reporting.
4. Use the User Status Change drop-down list to specify if applying this status to the user will cause that user to become active, inactive, or that there is no change in status.
5. Check the Enable Effective Date box if you want effective dates to be enabled for this status.
6. Check the Enable End Date box if end dates should be enabled for this status.
7. In the Add field, enter a reason for a change in employment status.
8. Click Add.
The value will be moved into the Current Reasons box where you can select it and attach it to the employment status. All reasons that you add will be available to apply to any other employment status.
9. In the Current Reasons box, select the reason for the employment change.
You can select only one reason per status.
Hint: You can remove a reason from the Employment Status module by selecting the reason and clicking Remove.
10. Click Save to keep your changes.