Introduction
Use this area to create job benefit codes, or payment options, for courses. For example, a code entitled 50% Employee Paid would allow a user to pay only half of the cost of a course. Job benefit is a notation only; it does not have any functionality. This property can then be tied to external reporting. For example, you might create a job benefit of 50% subsidized, which means that the user only pays for 50% of the course cost, while the organization pays the remainder.
Procedure
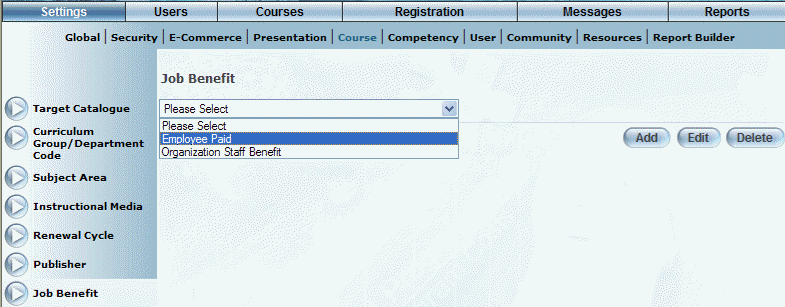
1. From the Settings menu, select Course, then Job Benefits.
The Job Benefit screen is displayed:
Managing Job Benefits
Note: The Add, Edit, Delete, and Save buttons are displayed when security setting 32: Function permissions is enabled.
2. You can perform the following operations:
· To edit a job benefit: Use the drop-down list to select a job benefit and click Edit. The screen is re-displayed with existing values (explained below) that you can change. After you make your changes, click Save.
· To delete a job benefit: Use the drop-down list to select a job benefit and click Delete. You will be asked to confirm the operation. Click OK.
· To add a benefit: Click Add. The rest of the procedure assumes you are adding a job benefit.
The screen is re-displayed:
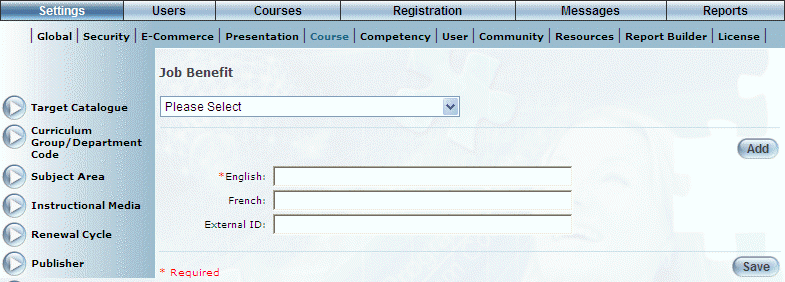
Adding a Job Benefit
3. In the English field, enter the name of the job benefit that you are creating.
You can enter a maximum of 100 characters (alphanumeric).
4. In the External ID field, enter a value that can be used for external reporting.
You can enter a maximum of 20 characters (alphanumeric).
5. Click Save to keep your changes.