Introduction
This report displays session requests that have been submitted by users regarding internal sessions. You can use this to view a history of session requests, and can filter by session status (Submitted, Denied, or Approved).
Note: The link to this report is displayed when security setting 580: Session Request Report is enabled.
Procedure
1. From the Reports menu, select Standard, then Advanced Reports.
2. Click the Session Request Report link.
The following screen is displayed:
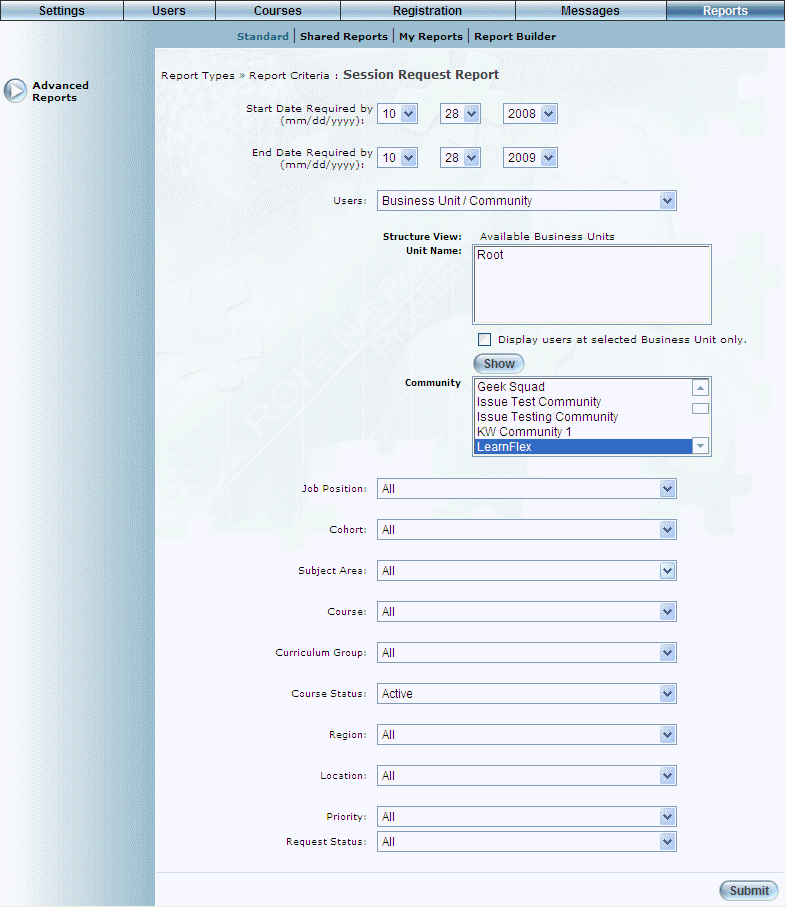
Session Request Report - Search
3. Use the Date Range - Start Date and End Date drop-down lists to specify the date range of your report results.
4. Use the Users drop-down list to specify the type of users (Individual or Business Unit/Community).
If you select Individual, a pop-up window will be displayed where you can search for and select the user whose session request information you want to view.
If you select Business Unit/Community, then additional text boxes will be displayed where you can select first the business unit, then the community whose users' session request information you want to view.
5. Use the Structure View link to navigate to the business units you want to include in the report.
You can:
· In the Unit Name box, select a business unit, then click Show to view the business units within the selected one. You can continue this process until you access the one you want to manage.
· Click either the Root or a business unit link in the Structure View section to return to that business unit.
The business units within the Unit Name box will be the ones included in the report.
6. Check the Display users at Selected Business Unit only box to display only those users within the selected business unit only.
7. Use the Job Position drop-down list to select the job position you want to include in the report.
8. Use the Cohort drop-down list to select the cohort you want to include in the report.
9. Use the Subject Area drop-down list to select the subject area you want to include in the report.
10. Use the Course drop-down list to select the course you want to include in the report.
11. Use the Curriculum Group drop-down list to select the curriculum group you want to include in the report.
12. Use the Course Status drop-down list to one of All, Active, or Archived.
13. Use the Region drop-down list to select the region you want to include in the report.
14. Use the Location drop-down list to select the location you want to include in the report.
15. Use the Priority drop-down list to select the priority you want to include in the report.
16. Click Submit.
The following screen is displayed:

Session Request Report Results
This screen displays the results of your report. The following columns of information are displayed:
· Course Name - Course Code: Displays the name and code of the course that the user requested.
· First Name: Displays the first name of the user who requested the session.
· Last Name: Displays the last name of the user who requested the session.
· User Name: Displays the user name of the person who requested the session.
· Business Unit: Displays the business unit to which the user belongs.
· Community: Displays the name of the community to which the user belongs.
· Job Position: Displays the job position to which the user belongs.
· Cohort: Displays the cohort to which the user belongs.
· Priority: Displays the priority of the session request.
· Region: Displays the region where the session is taking place.
· Location: Displays the location where the session is taking place.
· Date Required By: Displays the date by when the user wants to take the session.
· Comments: Displays any comments that the user entered about the session request.
· Request Status: Indicates if the status is Submitted, Approved, or Denied.
17. You can perform the following operations from this screen:
· Click Printable Version to view a version of the report that you can print.
· Click Microsoft Excel to export your results to a Microsoft Excel spreadsheet.