Procedure
1. From the main Hosted Paypage Settings screen, click Add.
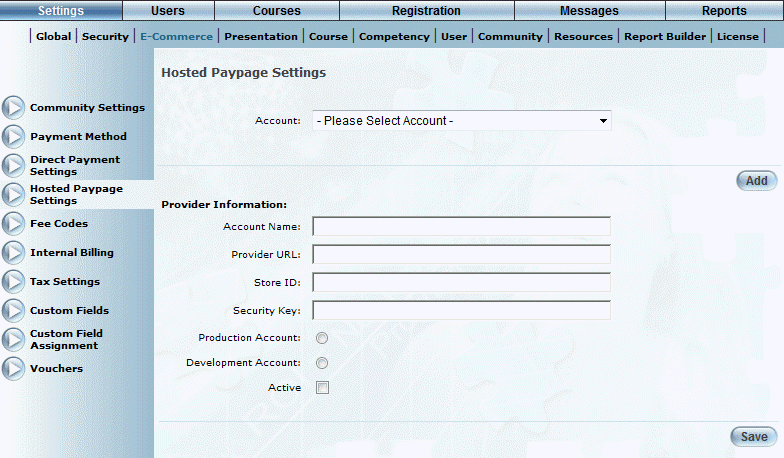
The screen is re-displayed with additional information:
Adding a Hosted Paypage
2. In the Account Name field, enter the name of the account.
You can specify numbers, lower and upper letters, hyphens, and _ @.
You can enter a maximum of 100 characters. This value is required.
3. In the Provider URL field, enter the fully qualified URL of the provider.
You can enter a maximum of 200 characters. This value is required.
4. In the Store ID field, enter your valid store ID.
This is a unique identifier for your Hosted Paypage, determined when your Hosted Paypage was configured.
You can enter a maximum of 50 characters. This value is required.
5. In the Security Key field, enter your unique security key.
This value was determined when your Hosted Paypage was configured.
You can enter a maximum of 150 characters. This value is required.
Note: The store ID and security key are sent as part of transaction requests to identify your store and its specific configuration. This is for security reasons.
6. Use the option buttons to indicate if these settings apply to a Production Account or a Development Account.
7. Check the Active box to indicate if this Hosted Paypage is active.
8. Click Save to keep your changes.