Introduction
You may add a new hosted paypage account (PayPal or Moneris) from this screen.
Procedure
1. From the Hosted Paypage Settings screen, choose the type of Hosted Paypage Account (PayPal or Moneris),
2. Click Edit.
3. Click the Add button to add a new hosted paypage account.
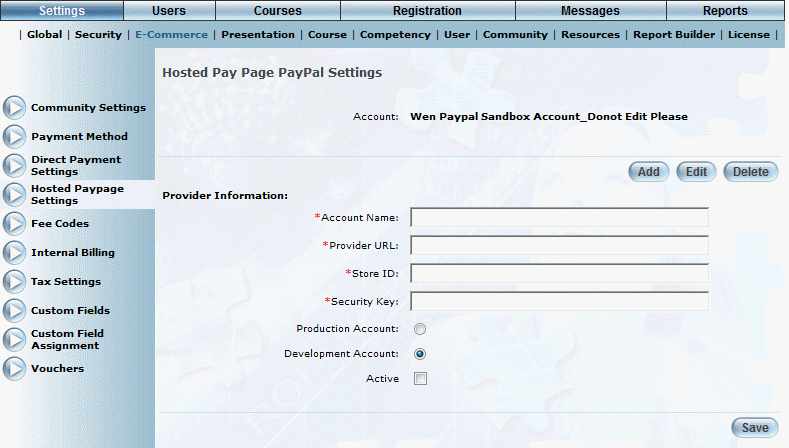
The following screen is displayed:

Adding a Hosted Paypage Account (PayPal or Moneris)
4. In the Account Name field, enter the name of the account.
You can specify numbers, lower and upper letters, hyphens, and_@. You can enter a maximum of 100 characters. This value is required and must be unique.
5. In the provider URL Field, enter the fully qualified URL of the provider.
You can enter a maximum of 200 characters. This value is required.
6. In the Store ID field, enter your valid store ID.
This is a unique identifier for your Hosted Paypage, determined when your Hosted Paypage was configured. You can enter a maximum of 50 characters. This value is required.
7. In the Security Key field, enter your unique security key.
This value was determined when your Hosted Paypage was configured. You can enter a maximum of 150 characters. This value is required.
8. Select the Production Account option when configuring the account for processing live transactions, or select the Development Account option when configuring the account for testing purposes.
9. Check the Active box to indicate that this Hosted Paypage account is active.
10. Click Save to keep your changes.